

Prerequisite
This tutorial assumes you have already installed Ruby and RubyGems. You can then install Middleman with the following command:
gem install middleman
Create your first Middleman project
Ok, let's create your first Middleman project. In you terminal paste the following command:
middleman new my_dato_project
and answer y to all the questions. Once finished enter in your project directory:
cd my_dato_project
Then fire the following commands:
ruby_version=`ruby -e 'puts RUBY_VERSION'`echo "ruby '$ruby_version'" >> Gemfileecho $ruby_version > .ruby-versionbundle install
and start the preview web-server:
bundle exec middleman server
This will start a local web server running at: http://localhost:4567/.
You can create and edit files in the source folder and see the changes reflected on the preview web-server. You can stop the preview server from the command-line using CTRL-C.
Build a simple catalog
Now is time to create a simple catalog in Middleman. It would be great if we could avoid hardcoding all the product metadata inside the HTML templates... this way some team members could concentrate on building up the database of content, while another team member could build the structure of the site.
Middleman Data Files allows to create .yaml files in a folder called data and makes this information available in your templates. The data folder should be placed in the root of your project i.e. in the same folder as your project's source folder.
Our catalog is a list of products where each product has the following attributes:
Title
Descriprion
Price
Create the file data/products.yml with some example data:
- title: "Star Wars Chewbacca Slippers"description: "Slippers emit two different Wookiee roars when you walk!"price: 29.99- title: "Star Wars R2-D2 Coffee Press"description: "Holds 32 ounces of coffee for you (4 cups)"price: 39.99
Also create a products.html.erb template in your source folder to iterate through your products:
<h1>Catalog</h1><div><% data.products.each do |p| %><p><%= p.title %></p><% end %></div>
and add a link to the products page in your layout file /source/layouts/layout.erb just under the body tag:
<%= link_to "Catalog", "products.html"%>
Well done! Now try to navigate your homepage at http://localhost:4567 and click one the Products link.
Now you probably want to have a dedicated page for each of your products where you can show the description and the price, so create a new file named source/product.html.erb with the following content:
<h1><%= product.title %></h1><div><%= product.description %></div><div><strong><%= number_to_currency(product.price) %></strong></div>
Middleman has a nice feature called proxy pages that let us use this file as a template for our dynamically generated product pages. Edit the file config.rb and add the following lines of code:
ignore "/product.html"data.products.each do |p|proxy "/#{p.title.parameterize}.html", "/product.html", locals: { product: p }end
The first argument of the proxy method is the URL of the page we want to produce, the second one is the template file, and the "locals" are the variables we'll inject into our template file. We are "slugifying" the product title to generate the permalink of each product page, so in our case the following pages will be generated:
Now you can edit the file /source/products.html.erb and replace the following lines
<% data.products.each do |p| %><p><%= p.title %></p><% end %>
with these ones, so that each product will link to its detail page:
<% data.products.each do |p| %><p><%= link_to p.title, "#{p.title.parameterize}.html" %></p><% end %>
Well done!
Deploy your first Middleman project
Ok, now that you have the ugliest (but perfectly working) catalogue in the world, you need to deploy your website somewhere. You can simply run the command middleman build to build your static website in the build folder, than you can manually copy al the files to your preferred hosting platform.
Having to manually repeat the same process again and again every time you change a single line of code can be quite frustrating, but you can do much better and automate the deploy process!
Deploy with Github and Netlify
Create a new repository on GitHub. To avoid errors, do not initialize the new repository with any README, license, or gitignore files. You can add these files after your project has been pushed to GitHub.
For our purposes, let’s call your new repo my_dato_project.
In your terminal initialize the project directory as a Git repository.
git init
Add the files in your new local repository. This stages them for the first commit.
git add .
Commit the files that you’ve staged in your local repository.
git commit -m 'First commit'
At the top of your GitHub repository’s Quick Setup page, click the clipboard icon to copy the remote repository URL. In Terminal, add the URL for the remote repository where your local repository will be pushed.
git remote add origin GITHUB_REPOSITORY_URL
Now, it’s time to push the changes in your local repository to GitHub:
git push origin master
Now that your assets are up and running on GitHub, let’s connect them to Netlify.
Connecting to Netlify
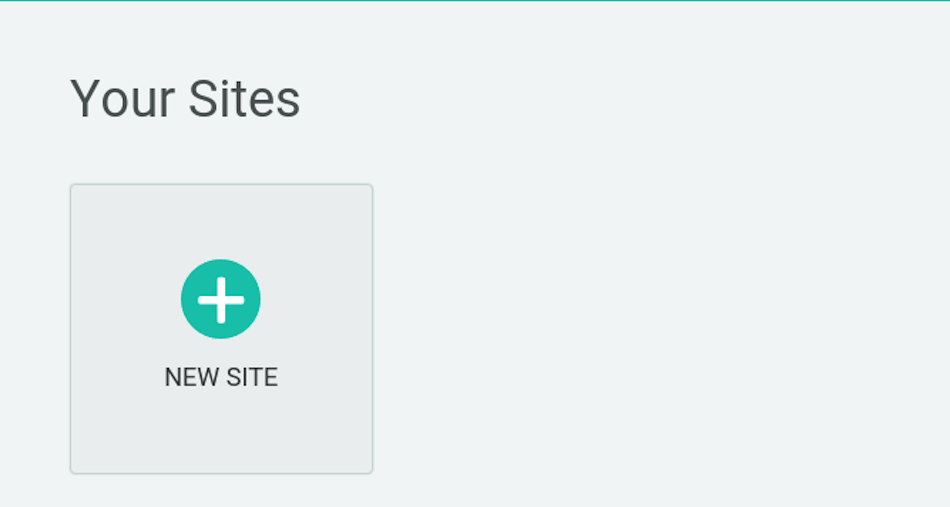
Step 1: Add Your New Site
Creating a new site on Netlify is simple. Once you’ve logged in, you’ll be taken to https://app.netlify.com/sites. If you’re just starting out, there’s only one option.

Step 2: Link to Your GitHub
Clicking “New Site” brings you to this screen:


When you push to GitHub, Netlify does all the work. No more manual deploying of updates or changes!
Since your assets are hosted on GitHub, we’ll need to link Netlify to GitHub. Click “Link to GitHub”.
Step 3: Authorize Netlify


It’s time to allow Netlify and GitHub to talk to each other. Clicking the “Authorize Application” button will do just that. Like it says in the image below, Netlify doesn’t store your GitHub access token on our servers. If you’d like to know more about the permissions Netlify requests and why we need them, you can visit https://docs.netlify.com/github-permissions/.
Step 4: Choose Your Repo


Now that you’ve connected Netlify and GitHub, you can see a list of your Git repos. There’s the my_dato_project repo we just pushed to GitHub. Let’s select it.
Step 5: Configure Your Settings

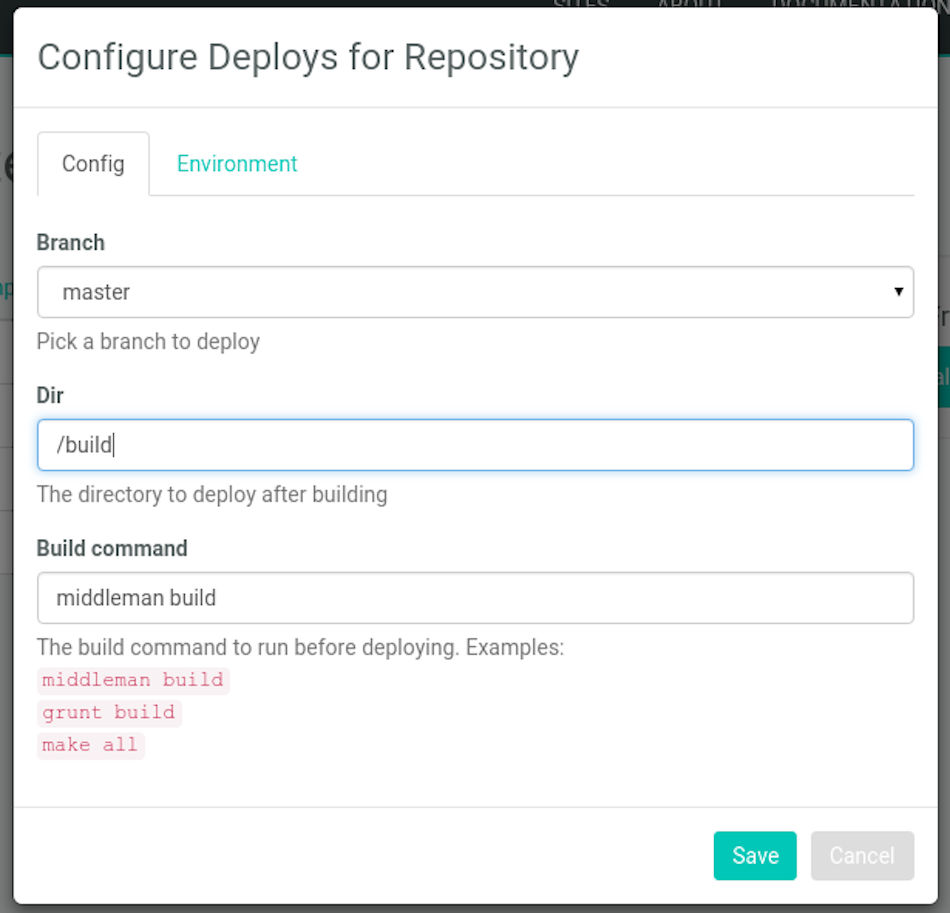
Here you can configure your options. For the purposes of this tutorial, there’s nothing you need to change, so just click “Save”.
Step 6: Build Your Site

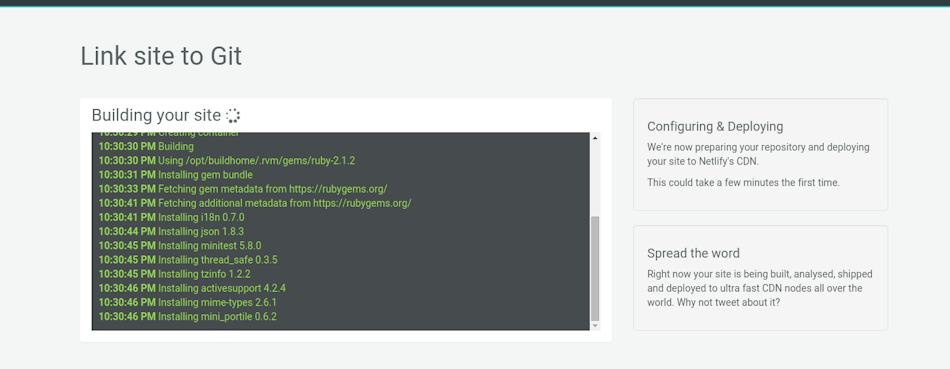
Now it’s time to sit back and relax. Go grab something cold to drink, scratch the dog behind the ears, or just get up and walk around (you’ve probably been in front of the computer for too long today, right?). Netlify will do the rest, and you can watch the progress.
Step 7: Done

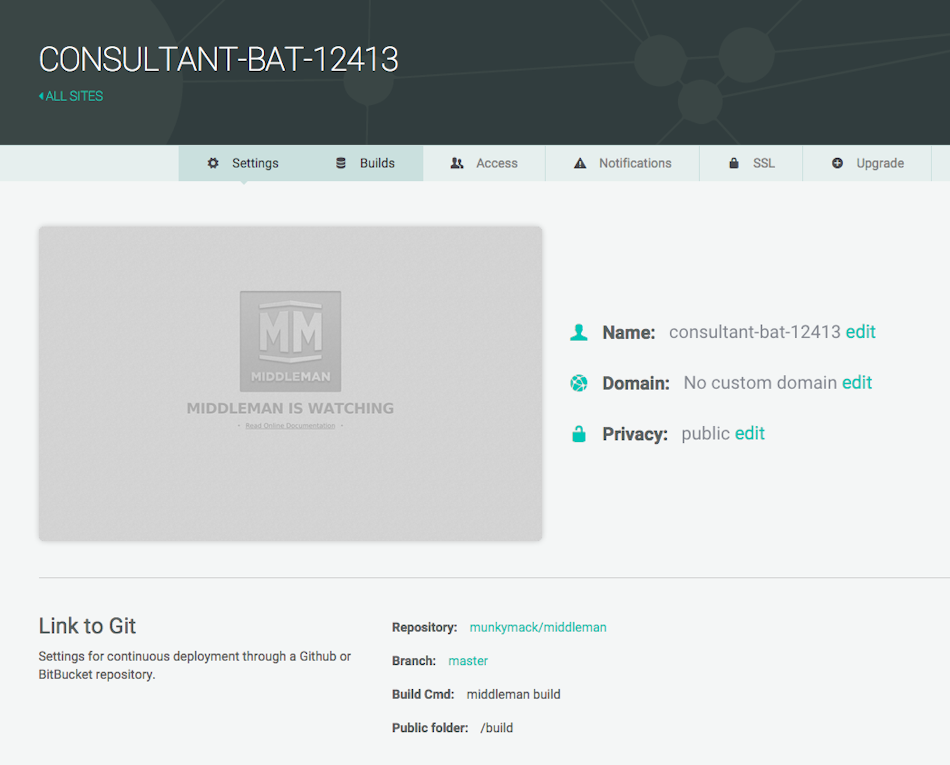
Wait, you thought there was going to be more? Nope! Netlify has done it all for you, including giving your site a temporary name. Let’s make it look a little prettier changing the name of the project:


There, that’s better. Now you can add your custom domain, and your site will be live for your adoring public to view. Congratulations!!!
Using DatoCMS
Until now it's all wonderful, but what about when you need to add, edit or delete a product? Actually is not that difficult: all you need to do is open the data file /data/products.yml, edit the items data, commit your changes and push it to GitHub. Netlify will grab the changes and will deploy your updated website for you.
If this can be fine for you, it certainly cannot be done if the person in charge of updating catalog is not a programmer and or is not confortable with terminal.
That's where DatoCMS shines
DatoCMS is a fully customizable administrative area for your static websites. The administrative interface is incredibly simple to use, yet flexible enough to allow the management of pretty much any kind of website.
Best of all, your customers don't need not know anything about Ruby, Middleman, Github, etc. neither they need to install stuff on their computers. You do the dirty work building the website with Middleman, and they can customize thier contents with a browser, just like they're used to do with ie. Wordpress.
Let see how this magic works
Step 1: Add Your New Site
Creating a new site on DatoCMS is simple. Once you’ve logged in, you’ll be taken to [https://dashboard.datocms.com/account/sites](your account dashboard). If you’re just starting out, there’s only one option.

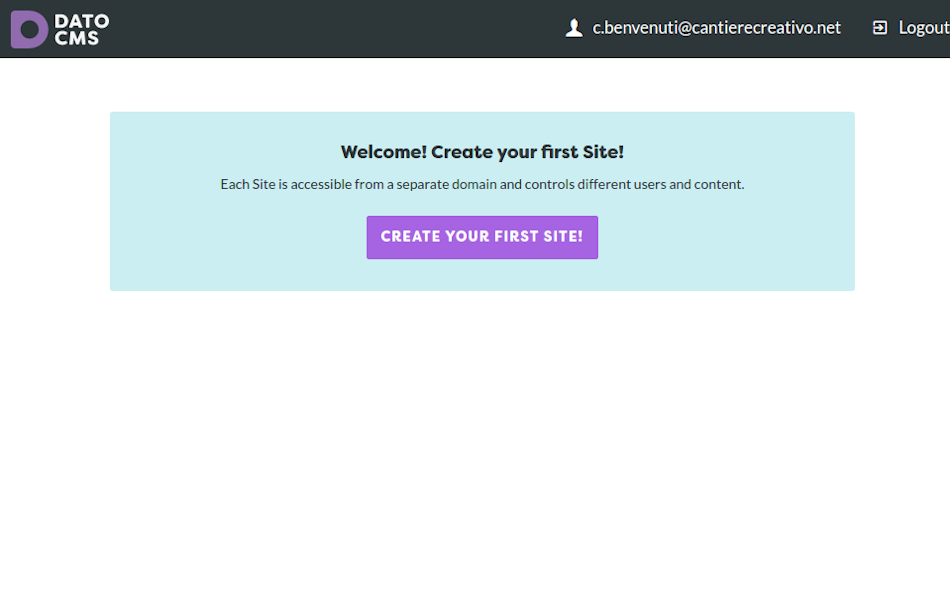
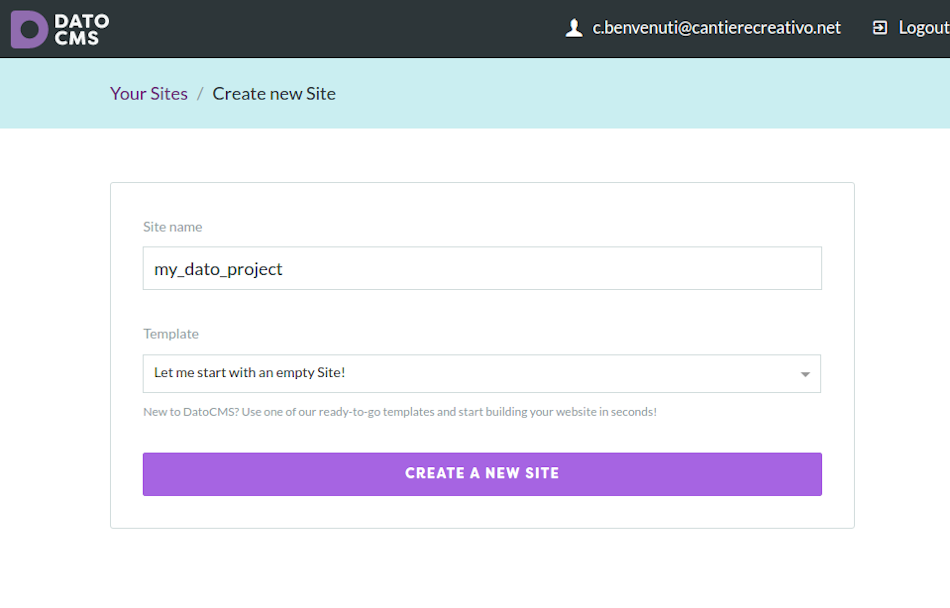
Give your website a name and eventually select a template to start your project. In our case we'll start with an empty site template:
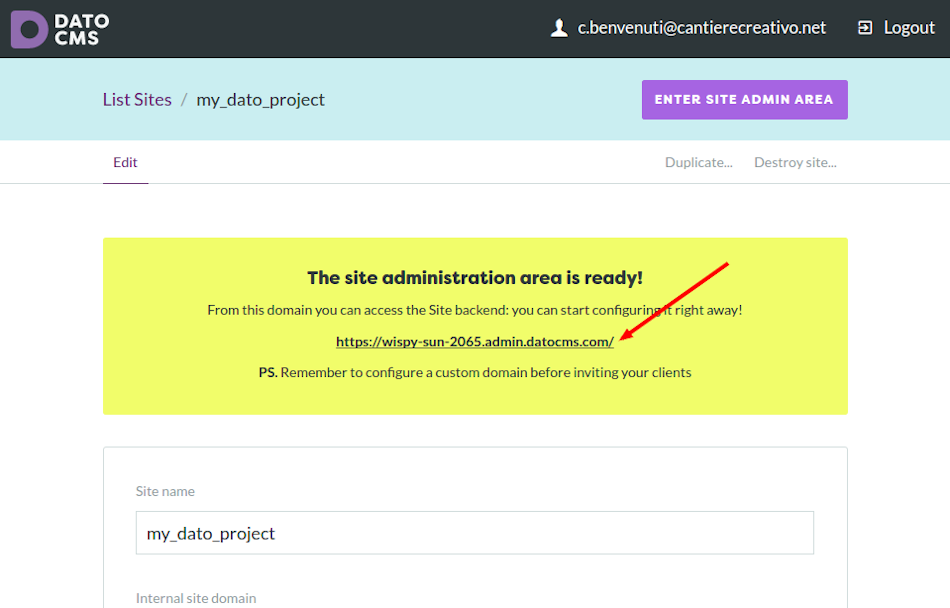
Step 2: Enter your Admin dashboard
After you click on "Create a new site", DatoCMS will create your administrative area in a randomly-generated subdomain. You can adjust some settings, but for now just click on the given link and enter in the Admin Area.
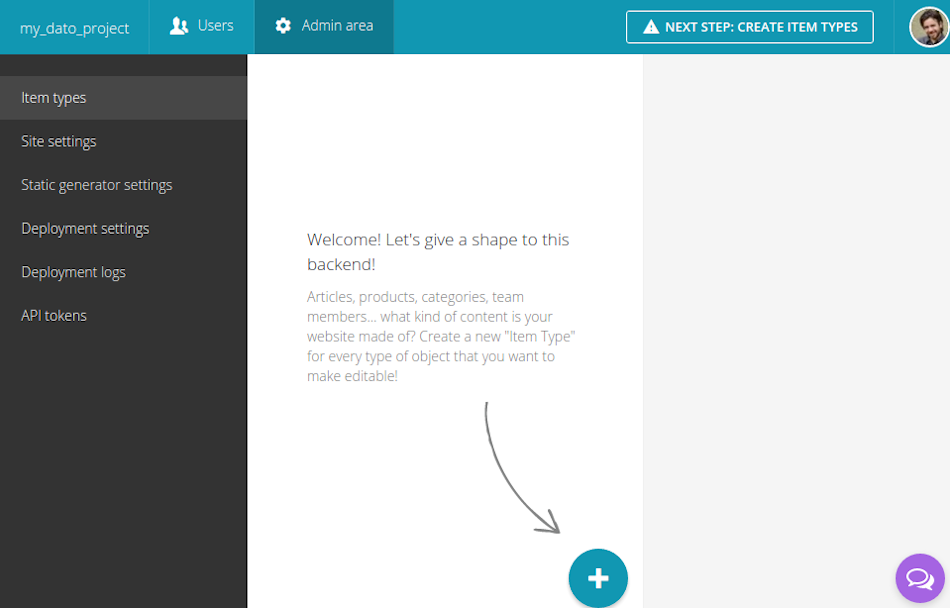
Step 3: Create the Item Types
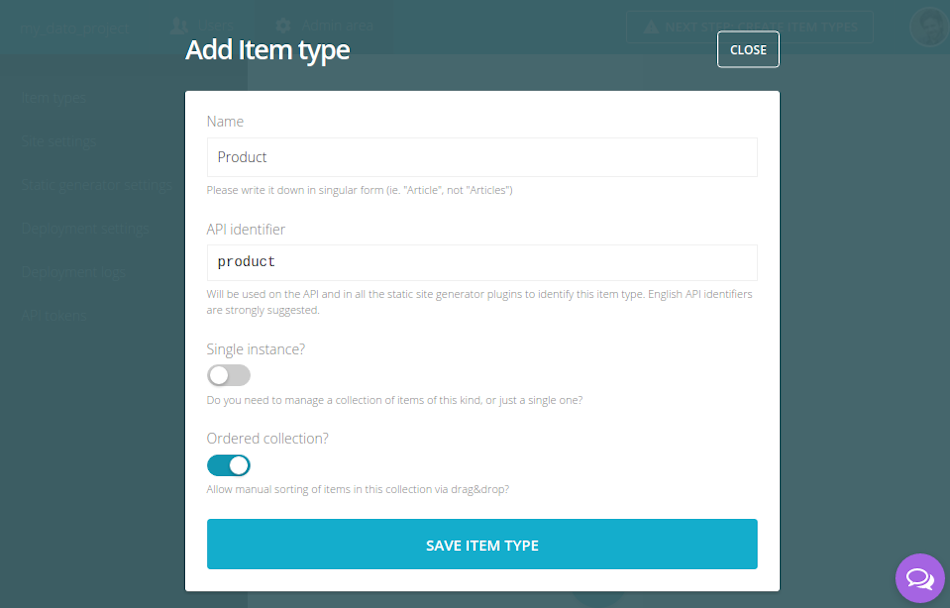
Now it's time to create the a place where to store all the informations related to your Products. In DatoCMS this place is named "Item Type". Try to think of a DatoCMS ItemType as a table in a database. Click on the plus button:
Give your Item Type the name Product. We are going to have a collection of products so DO NOT check the "Single Instance" flag. Enable the "Order collection" as in the picture to be able to reorder your product list once populated.
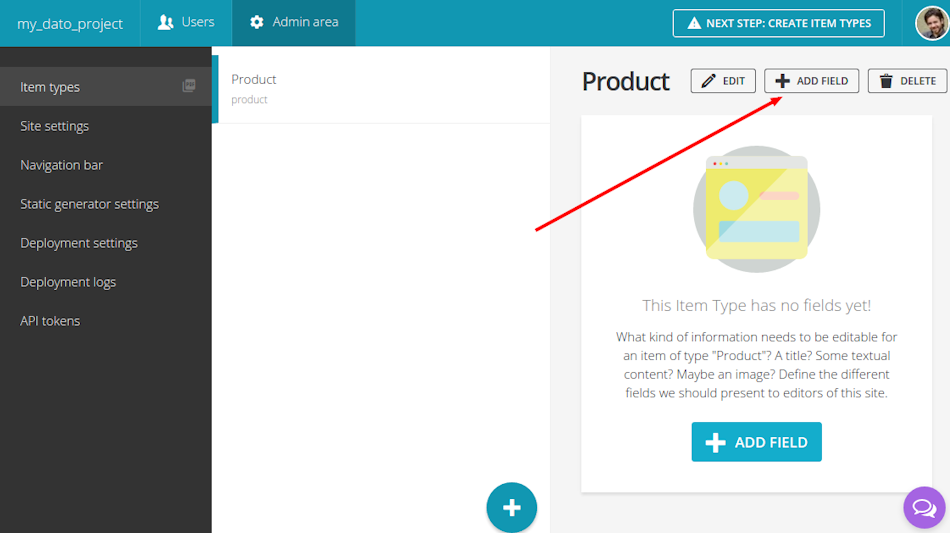
Step 4: Define the product fields
Now that you have the "Product" ItemType (again, think of ItemTypes as a table in a DB) you have to define the Product attributes. To begin click the "Add Field" button:

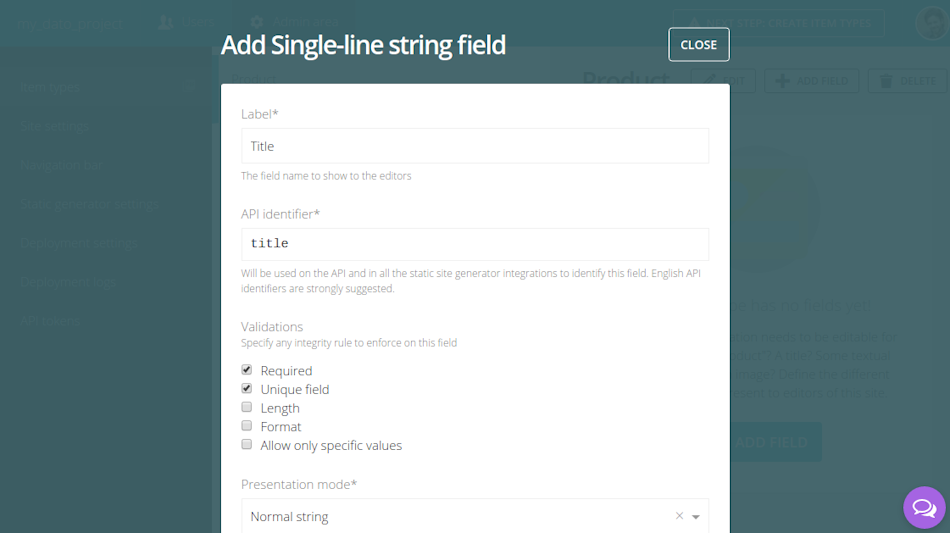
Now let's add the "Title" attribute. DatoCMS offers a lot of specialized field types, but in our case a "Simple-line string" is fine, so just click it. Give a "Label" to your field and define your validation rules as in image below, than click on the "Save Field" button:
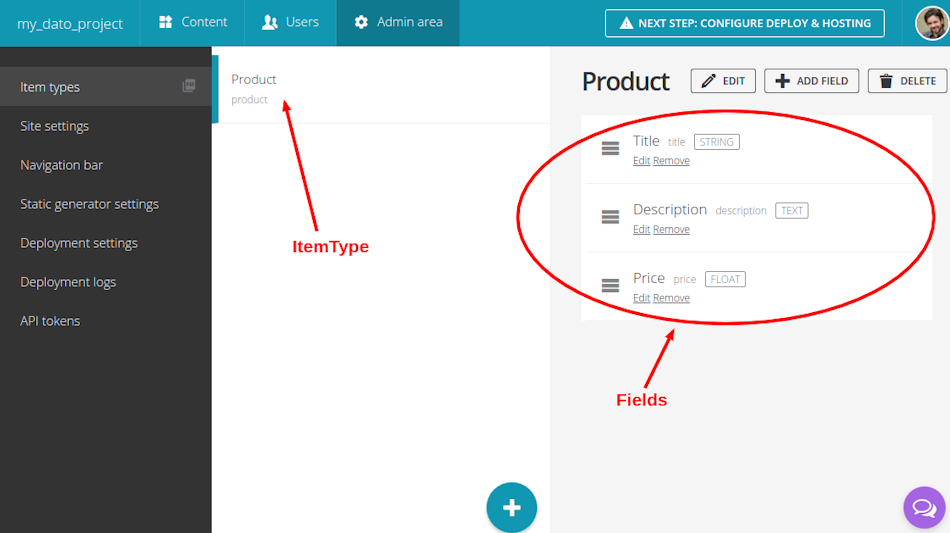
Now repeat this taks for the Description and for the Price field, choosing respectively "Long text" and "Floating-point number" as field types:
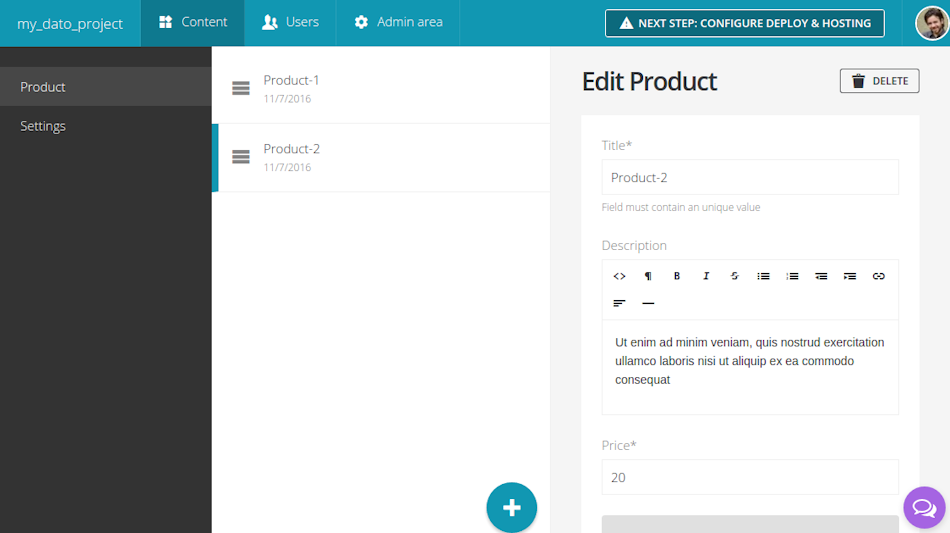
Step 5: Populate your catalogue
Now that you have the "Product" item type and its attributes defined, you can start to insert products in your catalog! Click on Content in the top navigation bar then click on the plus button to insert a couple of products.
Important
You do not need to give your customer access to your Administrative Area just to populate the catalog, but you can restrict the access to the DatoCMS only to the Content section. To do so just click to Users on the top navigation bar and invite your customer/editor/collaborator.
Integrate DatoCMS with Middleman
Ok, just recap what we have done until now:
We created a Middleman website
We added our products metadata to a separate file in the
datafolderWe committed all the project files to a GitHub repository
We created a new Site in Netlify
We linked the Netlify Site to our Github repo to allow an automated deploy on every commit
We created a new Site on DatoCMS
We created the "Product" ItemType and its attributes
We populated the catalogue in DatoCMS
What we want now is to get rid of the YAML file in the data folder on our Middleman project and integrate the data from DatoCMS instead. That's a trivial task, thanks to the middleman-dato Gem
Open your Gemfile on your Middleman project and add the following line:
gem 'middleman-dato'
then in your terminal paste the following command:
bundle install
In your config.rb paste the following code to activate the dato plugin:
activate :dato,token: 'SITE_READ_ONLY_TOKEN',base_url: 'http://www.mywebsite.com'
You obviously need to replace the SITE_READ_ONLY_TOKEN string with the actual token. You can find that token in your DatoCMS Admin area:

Now that you Middleman can retrieve data from DatoCMS, all you need to do is to edit the file /source/products.html.erb and replace the following line
<% data.products.each do |p| %>
with this one:
<% dato.products.each do |p| %>
In this way you are telling Middleman to not get information from the data files in the data folder, but from the DatoCMS API.
As you can see, if your site has an item type with product as API identifier, you can get the complete array of items with dato.products — yep, the API identifier pluralized.
In the same way you need to change the URL generated in config.rb replacing the following line:
data.products.each do |p|
with
dato.products.each do |p|
Remember to define this proxy route after the activation of the DatoCMS plugin, otherwise Middleman with throw you an error!
You don't even need to change the source/product.html.erb, as the attributes name defined in DatoCMS were the same we defined in the YAML file.
To be sure your data are coming from DatoCMS, get rid of the products.yml file:
rm data/products.yml
Restart your Middleman development server:
bundle exec middleman server
and enjoy.
Auto deploy your website when data on DatoCMS changes
Until now, to deploy a new version of your website on Netlify you needed to push a new commit on your GitHub repo. This is wonderful when you, as a developer, make some change to the website pages in Middleman, but you also want to deploy a new version of your website as products are added/edited/deleted on your DatoCMS Site by your clients!
DatoCMS handles all this for you
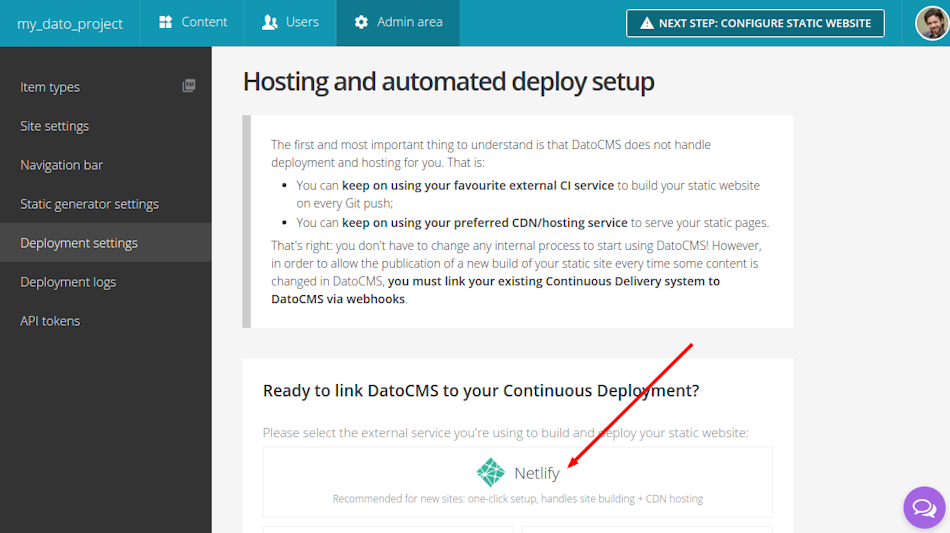
On your DatoCMS Admin area click on Deployment settings, than on Netlify:
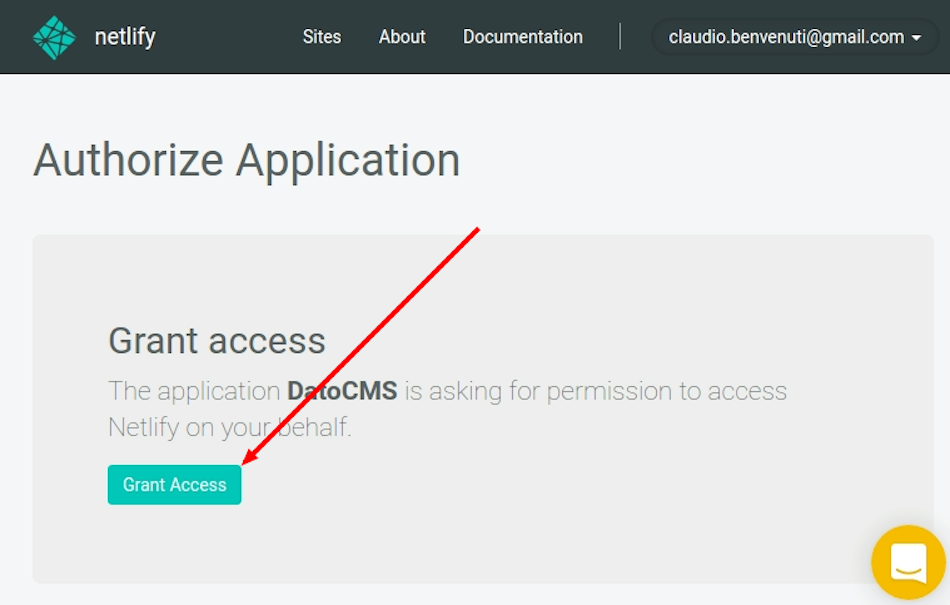
On the new windows the will popup, click on "Grand Access" to allow DatoCMS to setup the auto-deploy meahcanism for you:

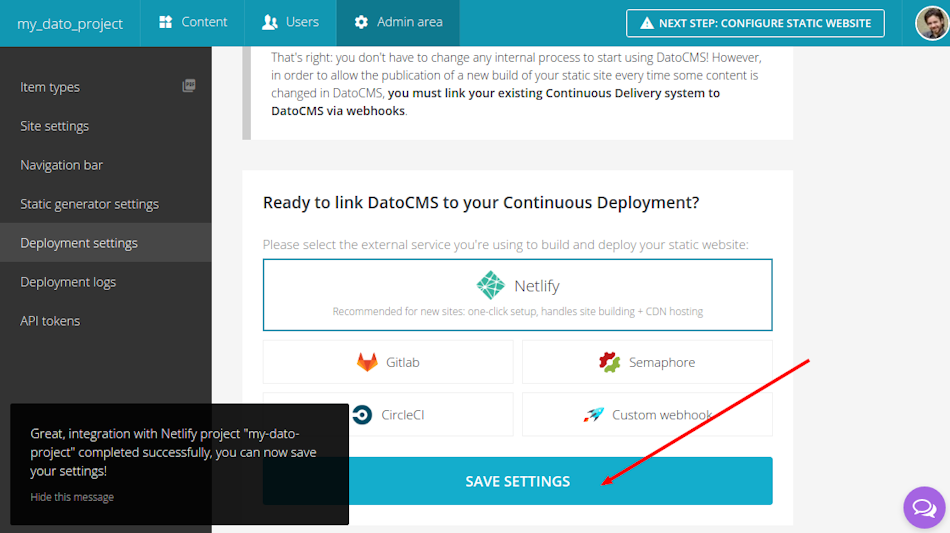
Select your Netlify Site that have to be build upon data changes on DatoCMS:
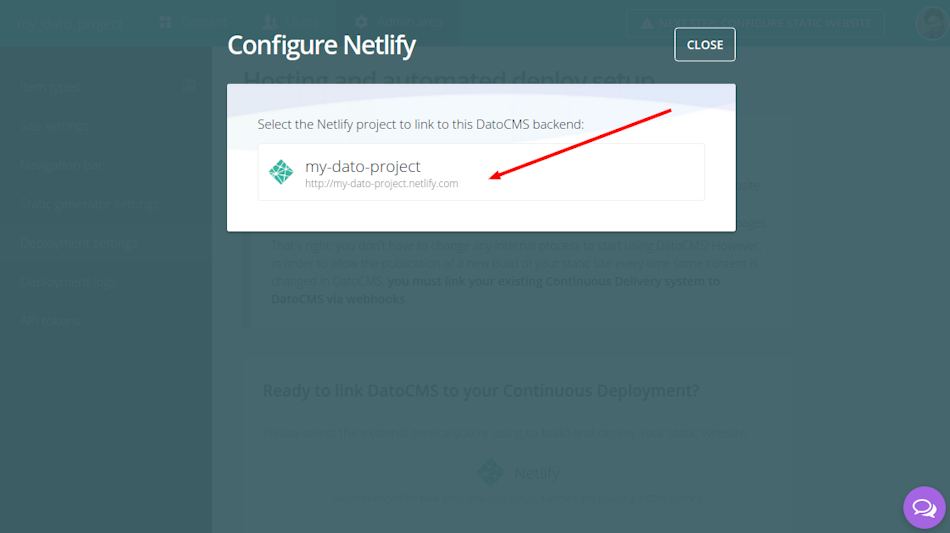
And click the Save Settings button:
Now every time you change your data in DatoCMS, you can trigger a new deploy on Netlify simply clicking on the Publish button:


That's it!
Middleman is a great static site generator and Netlify is perfect for 1 click continuos deployment. DatoCMS "seems like it'll be the last piece of the puzzle!", as our customers says. Just give it a try and feel free to contact our customer support for any questions.
Happy coding!