General concepts > Webhooks
If you need to know when data has changed in one of your projects, you can create customized webhooks to get HTTP notifications as soon the events occur.
For example, you might use webhooks as the basis to:
Integrate/sync DatoCMS data with third-party systems (Snipcart, Shopify, Algolia, etc.);
Get Slack/email notifications;
Automatically post an update on Facebook/Twitter;
Produce an automatic deploy on your staging environment;
You can connect DatoCMS webhooks to any endpoint you like — for example, some custom AWS lambda function.
If you don't want to write any code, you can use Zapier Webhooks to connect a DatoCMS event with hundreds of different external services, creating any kind of complex automation workflow.
Configure a webhook
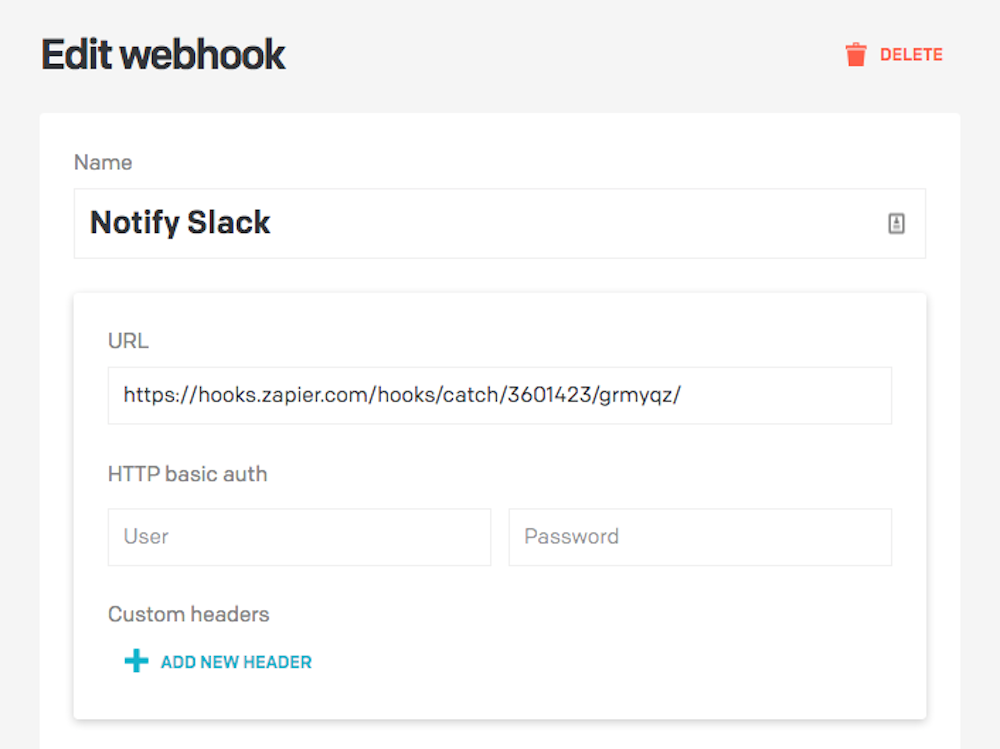
You can set up a new webhook under the Settings > Webhooks section of your administrative area.
You can enter any URL as the destination for calls, add HTTP basic authentication and add custom HTTP headers:

Webhook triggers
Webhook triggers let you specify under which circumstances an HTTP call will be performed towards your endpoint:

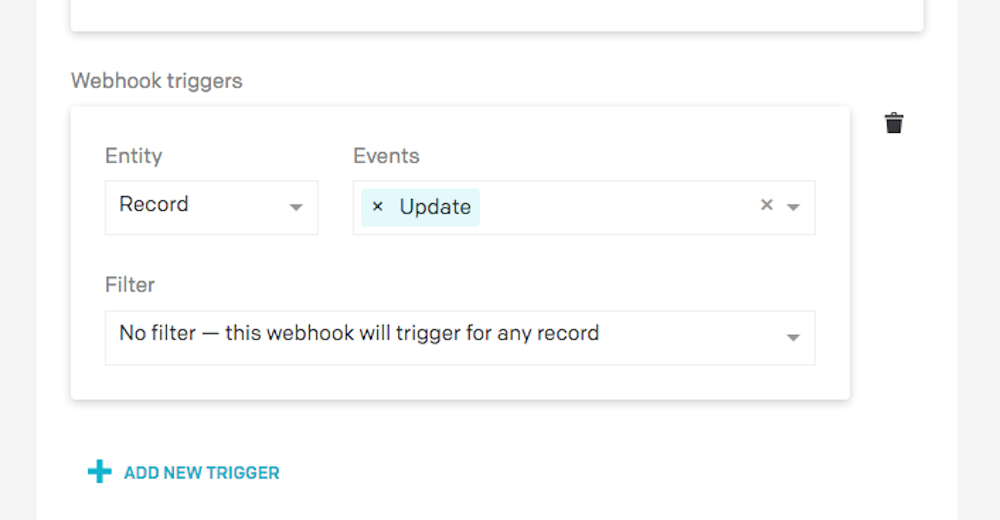
You can add as many triggers as you want to a single webhook. DatoCMS supports events for these kinds of objects:
Record: triggers whenever a record is created, updated, deleted, published, unpublished or all of the above. Additionally, you can trigger the webhook only for specific records or records belonging to specific models
Model: triggers whenever a model is created, updated, deleted or all of the above. Changes made to a model's field will trigger a call as well. Additionally, you can trigger the webhook only for specific models
Upload: triggers whenever any upload is created, updated, deleted or all of the above
Build trigger: triggers whenever a build gets triggered
Environment: triggers whenever an environment gets created, updated, promoted or deleted
Maintenance Mode: triggers whenever an admin activates or deactivates the maintenance mode
SSO User: triggers when an SSO User is added to a project as a collaborator
Customize the URL or HTTP payload
If you want, you can also customize the HTTP body of the outgoing requests. To do that, hit the Send a custom payload? switch and provide the new payload.
You can use the Mustache language to make the payload dynamic. The original payload we would send is used as source for the template. You can experiment with the Mustache language in their sandbox, or read their docs.
As an example, this custom payload template:
{"message": "{{event_type}} event triggered on {{entity_type}}!","entity_id": "{{#entity}}{{id}}{{/entity}}"}
Will be converted into the following HTTP body:
{"message": "update event triggered on item!","entity_id": "123213"}
You are not limited to send JSON payloads: just make sure that if the payload is not in JSON format, you configure the proper Content-Type header.
Similarly, you can also insert Mustache tags in the webhook URL.
HTTP request details
DatoCMS will perform an HTTP POST request towards the specified endpoint. The HTTP body will be in JSON format, and will contain all the information relevant to the event just happened.
The body will contain the following information:
Event type: The type of event that triggered the webhook. i.e.: create, update, delete and so on.
Entity type: The type of entity that triggered the webhook.
Entity: The full payload of the entity serialized according to our Content Management API schema. The different type of entities are: Record, Model, Asset, Build Trigger, Environment, SSO User, Maintenance Mode.
Related entities: An array containing all serialized entities specified in the entity's relationships.
Previous entity (optional): Available only for the update event type and record entity type, it represents the serialized record before the update.
Environment (optional): The ID of the current environment.
As an example, in the case of a record update event, you can access the record state both before the update operation (previous_entity) and after (entity), making it easier to make a diff and see exactly what fields in the record changed:
{"environment": "foo-bar","entity_type": "item","event_type": "update","entity": {"id": "39830648","type": "item","attributes": {"name": "Mark Smith",},"relationships": {"item_type": {"data": {"id": "810928","type": "item_type"}},"creator": {"data": {"id": "42011","type": "account"}}},"meta": {"created_at": "2018-10-28T18:44:32.776+01:00","updated_at": "2021-08-17T09:11:56.145+02:00","published_at": "2021-08-17T09:11:56.143+02:00","publication_scheduled_at": null,"unpublishing_scheduled_at": null,"first_published_at": "2018-10-28T18:44:32.789+01:00","is_valid": true,"status": "published","current_version": "117626080","stage": null}},"previous_entity": {"id": "39830648","type": "item","attributes": {"name": "John Smith",},"relationships": {"item_type": {"data": {"id": "810928","type": "item_type"}},"creator": {"data": {"id": "42011","type": "account"}}},"meta": {"created_at": "2018-10-28T18:44:32.776+01:00","updated_at": "2021-08-17T09:11:53.371+02:00","published_at": "2021-08-17T09:11:53.367+02:00","publication_scheduled_at": null,"unpublishing_scheduled_at": null,"first_published_at": "2018-10-28T18:44:32.789+01:00","is_valid": true,"status": "published","current_version": "117626079","stage": null}},"related_entities": [{"id":"810928","type": "item_type","attributes": {"name": "Author","api_key": "author","collection_appearance": "compact","singleton": false,"all_locales_required": false,"sortable": true,"modular_block": false,"draft_mode_active": false,"tree": false,"ordering_direction": null,"ordering_meta": "created_at","hint": "","inverse_relationships_enabled": false},"relationships": {"singleton_item": {"data": null},"fields": {"data": [{"type": "field","id": "124"}]},"fieldsets": {"data": [{"type": "fieldset","id": "124"}]},"title_field": {"data": null},"image_preview_field": {"data": null},"excerpt_field": {"data": null},"ordering_field": {"data": null},"workflow": {"data": null}},"meta": {"has_singleton_item": false}}]}
HTTP headers
The webhooks calls have some custom headers:
x-site-idwith the site IDx-webhook-idwith the webhook IDx-environmentwith the environment ID, if the entity that generates the webhook lives in an environment, for example a record
Debug and keep track of webhooks activity
Each time a webhook gets triggered, DatoCMS creates a WebhookCall object that contains all the relevant information about what just happened. You can browse webhook calls under the Webhooks activity log section of your administrative area, or using our API.

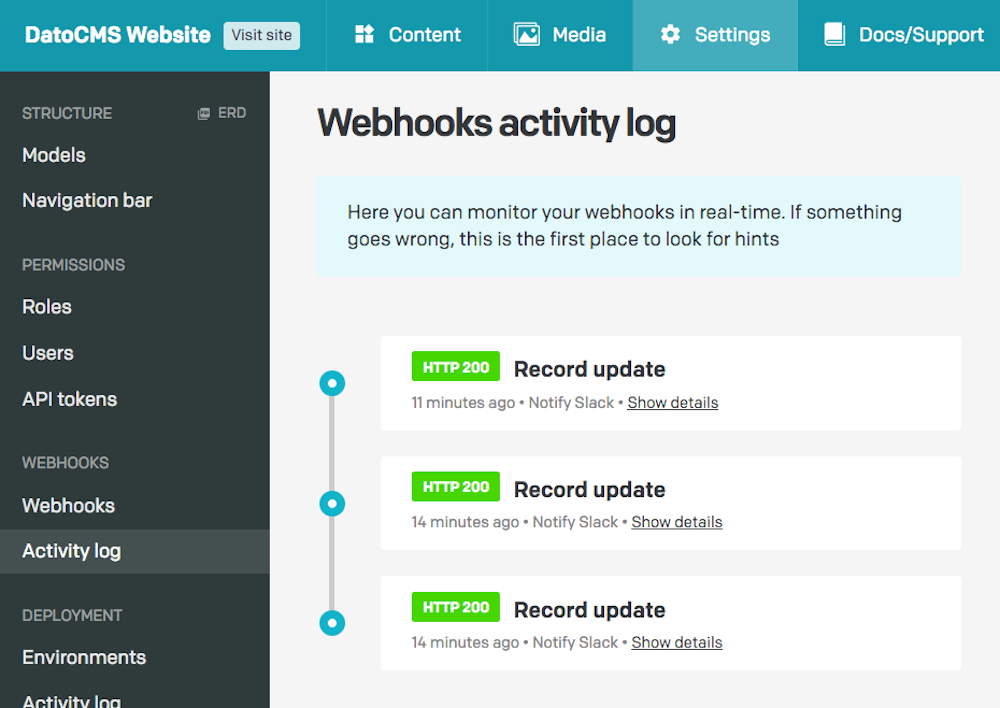
In case something went wrong (4xx/5xx HTTP status code, server timeout, etc.) you will be able to manually resend the webhook:


Favor asynchronous work over synchronous
DatoCMS expects that integrations respond within 5 seconds of receiving the webhook payload. If your service takes longer than that to complete, then DatoCMS terminates the connection and the payload is lost.
Since it's impossible to predict how fast your service will complete, you should do all of "the real work" in a background job. Resque (for Ruby), RQ (for Python), or RabbitMQ (for Java) are examples of libraries that can handle queuing and processing of background jobs.
Note that even with a background job running, DatoCMS still expects your server to respond within five seconds. Your server needs to acknowledge that it received the payload by sending some sort of response. It's critical that your service performs any validations on a payload as soon as possible, so that you can accurately report whether your server will continue with the request or not.