Dropdown Conditional Fields v2
Conditionally show or hide fields based on a dropdown selection. Visual rule editor included — no JSON required.
Dropdown Conditional Fields — DatoCMS Plugin
Conditionally show or hide fields in your DatoCMS record forms based on the selected value of a dropdown field. Ships with a visual rule editor — no raw JSON required.
> Fork notice: This plugin is based on the original datocms-plugin-dropdown-conditional-fields by John DeWyze. It has been rewritten from scratch for the modern DatoCMS Plugin SDK (v2), migrated from Webpack to Vite, converted to React + TypeScript, and extended with a visual configuration UI. Thank you, John, for the original idea and implementation!
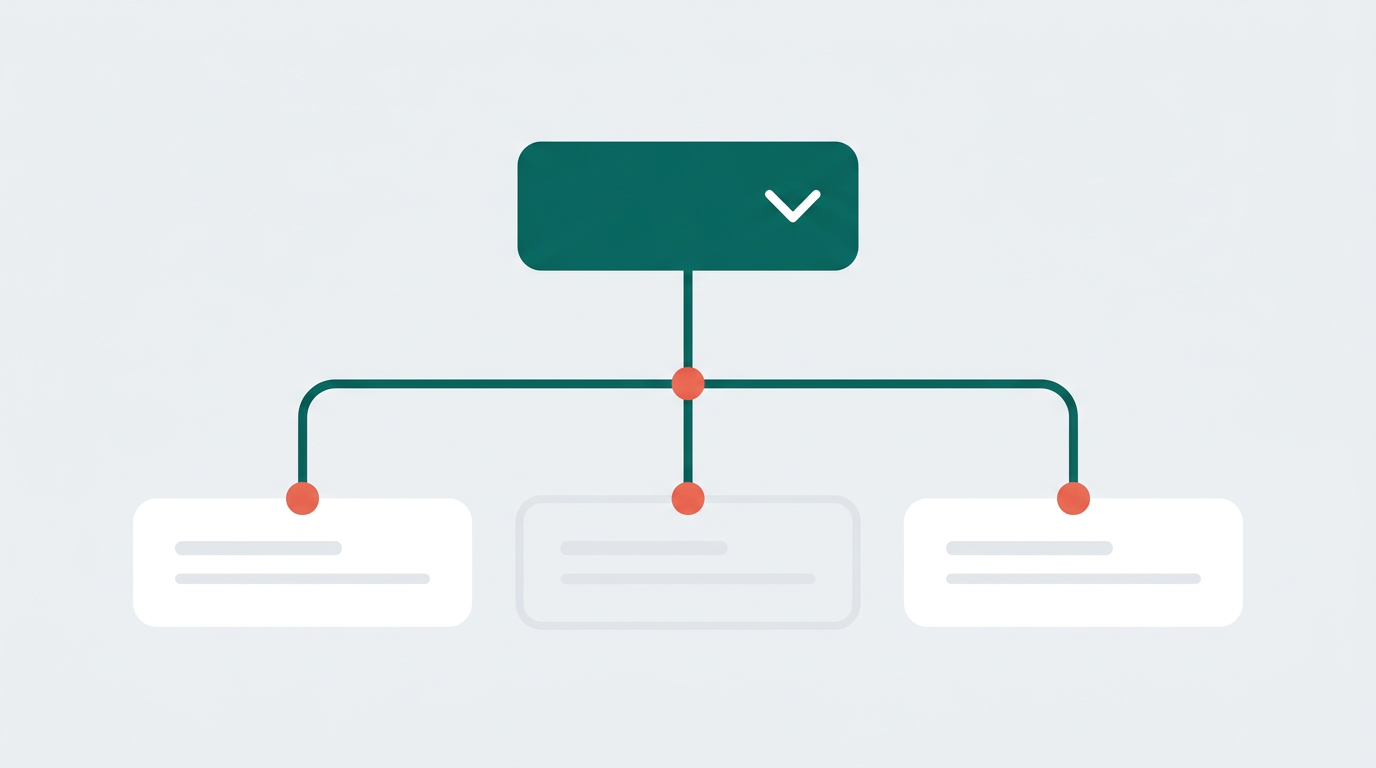
How It Works
- A dropdown (select) field acts as the trigger.
- You define rules: for each possible dropdown value, you choose which other fields in the same model should be visible.
- All fields managed by the plugin but not matching the current dropdown value are automatically hidden.
Setup Guide
1. Create the Trigger Field
In your DatoCMS model, create a Single-line string field (e.g. category).
Under Presentation, set the editor to "Select input" and add your dropdown options (e.g. Blog, Product, Event).
2. Install the Plugin
Install from the DatoCMS Marketplace or add it as a private plugin under Settings > Plugins.
3. Attach the Plugin to Your Field
Open the trigger field settings and go to the Presentation tab. Under Field Add-ons, click "Add" and select "Dropdown Conditional Fields".
4. Configure the Rules
After adding the addon, a visual rule editor will appear:
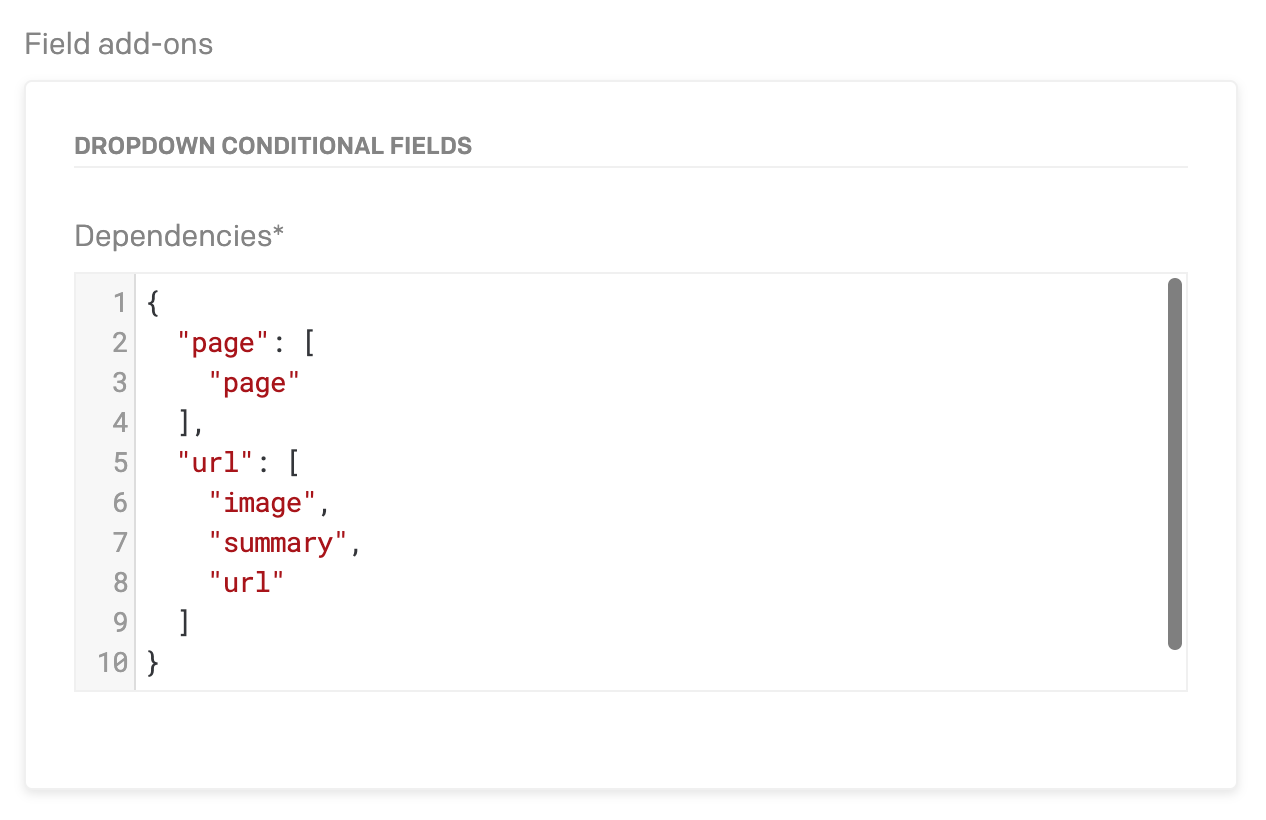
- Click "+ Add new rule" to add a rule.
- If the field has enum validators, pick the dropdown value from the list. Otherwise, type the exact value.
- Select the fields to show — all other fields in the model are available for selection.
- Add as many rules as you need.
Example: If your dropdown has values Blog, Product, and Event:
| Dropdown Value | Visible Fields |
|---|---|
blog | author, content |
product | price, availability |
event | date, location |
Fields not assigned to the currently selected value will be hidden automatically.
5. Global Settings (Optional)
In the plugin settings, you can enable Debug Mode to log visibility changes to the browser console — helpful during setup.
Development
Prerequisites
- Node.js (LTS)
- npm
Getting Started
npm installnpm run devThe dev server starts at http://localhost:5175/. Enter this URL as the plugin Entry point URL in DatoCMS.
Available Scripts
| Command | Description |
|---|---|
npm run dev | Start Vite dev server |
npm run build | Type-check and build |
npm run preview | Preview production build |
npm run lint | Lint with ESLint |
npm test | Run unit tests (Vitest) |
npm run test:watch | Run tests in watch mode |
Tech Stack
- DatoCMS Plugin SDK v2.1 + datocms-react-ui v2.1
- React 19 + TypeScript 5
- Vite 6 (build + dev server)
- Vitest (unit testing)
Publishing
Build for production:
npm run buildThen publish to npm:
npm publishThe plugin will appear in the DatoCMS Marketplace within one hour.
Alternatively, deploy the dist/ folder to any static hosting provider and use the URL as a private plugin entry point.
License
ISC