

Just a couple of weeks ago we released the Plugins SDK, that enable the developers community to fully customize every project's administrative area.
Let's say we have a project that has, for example, an Author model and a Post model and each post is linked to an author by a single link field. In DatoCMS we can see which author created the post by navigating into the single post... but it is not possible to see which posts each author has written!


Being able to see inverse relationships it's a pretty common need: thanksfully we can build a plugin for that, let's see how!
Run the project generator
To start straight away with the development and avoid writing boilerplate code, we've prepared a super-handy Yeoman generator.
Let's create the folder that will contain the skeleton of our plugin and, once inside the folder, let's run the generator:
mkdir inverse-relationshipscd inverse-relationshipsnpx -p yo -p generator-datocms-plugin -c 'yo datocms-plugin'
Here's a quick video of the tool in action:
As you can see, a number of questions will be prompted. Some of them are quite obvious (ie. the plugin name), others require a little more understanding of what's going on, so let's see them in detail.
Plugin type
DatoCMS supports three types of plugin: field editors, field-addons and sidebar widgets.
While the first two types of plugin operate on top of a particular field replacing/enhancing the default editor that DatoCMS provides, sidebar widget are rendered.. duh, on the sidebar of the record editor.
Since this plugin applies to an entire record instead of a single field, we'll pick the Sidebar widget option.
Field types the plugin is compatible with
DatoCMS plugins need to be assigned to a field in one of your models to come alive, so while creating new plugins you need to declare which kind of fields your plugin supports.
While it's quite obvious that you need to assign field editors plugins and field-addons plugins to a field, it might be less clear why this also applies to sidebar widgets, right? Well, the reason is that the sidebar widget might want to use the field's value to store some data (and yes, in case you're wondering, the underlying field won't be shown on the interface).
In any case, our sidebar widget plugin won't read/store any data, so we can just choose any field type (ie. JSON) and move on to the next question.
Configuration parameters
Parameters allow the final user to customize the plugin, and you as the developer are in charge of deciding to which degree you want your plugin to be customizable.
Global parameters are set just once for the whole project. In this case we need to ask the final user the API token to use to query the DatoCMS API and get the actual inverse relationships.
Instance variables, on the other hand, allow the final user to insert different settings every time the plugin gets applied on a field.
Our plugin requires two instance variables: the first one will store the name of the model you want to connect to (ie. post), the other will store the field that hosts the inverse relation between the two (ie. author).
Parameters need to be expressed in JSON. The format is pretty straight-forward, but feel free to take a look at our documentation for all the nitty gritty details:
{"global": [{"id": "datoCmsApiToken","label": "DatoCMS API Token","type": "string","required": true,"hint": "The DatoCMS API read-only token to use to query inverse relationships"}],"instance": [{"id": "itemTypeApiKey","label": "Model ID","type": "string","required": true,"hint": "The model you want linked records to show up (ie. <code>post</code>)"},{"id": "fieldApiKey","label": "Field ID","type": "string","required": true,"hint": "The single-link field to use as foreign key (ie. <code>author</code>)"}]}
Alright, I'm done configuring stuff!
If everything went right, you should see in your DatoCMS project an already configured plugin similar to this one:


As you can see, in this page you can already insert the only global configuration parameter we have, the DatoCMS API token. Let's do so and hit the Save button.
Assign the plugin to a JSON field
Now that the plugin is installed in the project, you need to apply it to a JSON field to see it working.
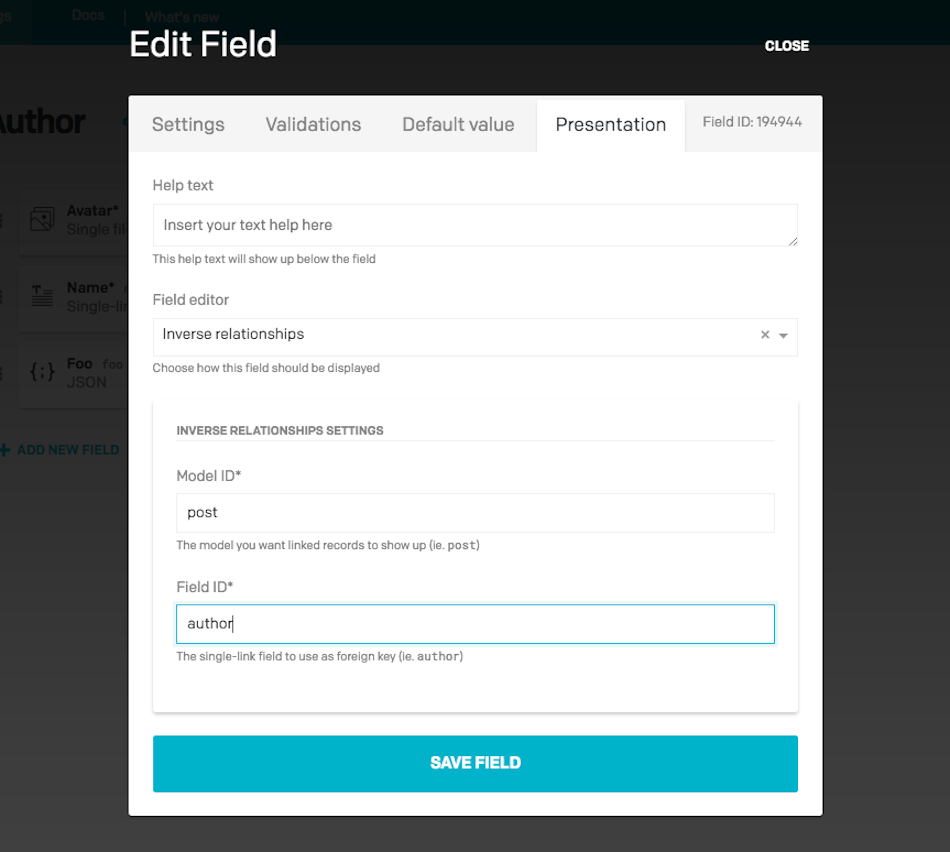
Navigate to the Author model (Settings > Models > Author) and add the JSON field that will host the plugin. You will notice that in the presentation tab you can select our plugin as the Field editor option and fill-in the instance configuration parameters:

See the plugin working
Technically speaking, plugins are small HTML5 applications that exist in a sandboxed <iframe> and interact with the main DatoCMS webapp.


As you can see, our generator already setup the Entry point of our plugin so that it points to a tunnel connected to our local project. That is, using the raw localhost URL would give us some mixed content errors due to the fact that the local development server runs in HTTP while the main DatoCMS webapp runs in HTTPS.
Anyway, just start your local webpack development server with:
yarn start
Once the server starts, go to one of your authors.. and voilà! You should see a glorious "Hello, world!" awaiting for you!


Write some code
Alright, the setup part is finished, it is time to get to the coding! Let's take a look at src/index.js file:
import './style.sass';window.DatoCmsPlugin.init((plugin) => {plugin.startAutoResizer();const container = document.createElement('div');container.classList.add('container');container.textContent = 'Hello, world!';document.body.appendChild(container);});
The project already includes our Plugin SDK, which exposes the DatoCmsPlugin.init() method. Its callback will be called when the cross-window communication between our plugin and the DatoCMS main webapp is in place, so all the code needs to be executed inside of it. The plugin.startAutoResizer() call will make sure the iframe will automatically resize whenever the content of the page changes.
Alright, let's start adding a title to the widget:
const container = document.createElement('div');container.classList.add('container');const title = document.createElement('h4');title.textContent = 'Linked content';document.body.appendChild(container);container.appendChild(title);
Great, now we can add to our project the datocms-client package, so that we'll be able to query the DatoCMS API to get the inverse relationships:
yarn add datocms-client
Once installed, we can require the package and instanciate the DatoCMS SiteClient using the datoCmsApiToken global parameter we configured earlier:
import { SiteClient } from 'datocms-client;window.DatoCmsPlugin.init((plugin) => {plugin.startAutoResizer();// ...const client = new SiteClient(plugin.parameters.global.datoCmsApiToken);});
Building up the query
The next thing to do is building the right query to get what you need, in this case all the Post records that are linked to a specific author.
The plugin object holds a couple of properties that are essential here. The first one is plugin.itemTypes that returns all the project's models. We can use it to get our Post model:
const postItemType = Object.values(plugin.itemTypes).find(itemType => itemType.attributes.api_key === plugin.parameters.instance.itemTypeApiKey);
The second is plugin.itemId, which is the ID of the current author record we're seeing. Looks we've got everything to build the query now!
const query = {'filter[type]': postItemType.id,[filter]: plugin.itemId,'page[limit]': 10,version: 'current',};client.items.all(query)
This returns all the blog posts that have the current record as its author. For each one of them we can create a link element and then append it to the iframe:
dato.items.all(query).then((items) => {items.forEach((item) => {const link = document.createElement('a');link.textContent = "title placeholder";const url = `#`;link.href = url;link.target = '_top';link.classList.add('link');container.appendChild(link);});}).catch((error) => {console.log(error);});
We now need to find out which is the title field for the Post model:
const titleFieldId = postItemType.relationships.title_field.data.id;const titleField = plugin.fields[titleFieldId];
Now we can build the url and show the appropriate title. Of course our item could be localized, so in this case we should get the title in the main locale:
if (titleField.attributes.localized) {const mainLocale = plugin.site.attributes.locales[0];link.textContent = item[titleField.attributes.api_key][mainLocale];} else {link.textContent = item[titleField.attributes.api_key];}const url = `/editor/item_types/${postItemType.id}/items/${item.id}/edit`;
Finally you should be able to see something like this:


Share your plugin with the world
It is now time to share your work with the community!
Open your package.json and README.md and make sure all the info is correct following our documentation.
Consider adding a nice cover picture and a preview GIF image so that when the plugin will be displayed our plugin catalog it will be easier to decide that this is the plugin we want.
When everything is ready, run npm publish, and you're good to go! The plugin will be added to the catalog in 10 minutes.


You can install the final plugin from our catalog or take a look at the complete code in this Github repo.