Algolia Next.js
How To Add Algolia InstantSearch to Your Next.js App
Providing great search experiences to users is an effective way to increase page views, conversions, and user engagement. However, implementing good search functionality into your website takes time and effort. Luckily, Algolia allows you to easily integrate search features into your application. In this article, you will learn how to integrate Algolia InstantSearch into your Next.js application.
What Is Algolia InstantSearch?
As stated in Algolia's docs, InstantSearch.js is an open-source UI library for JavaScript that lets you effortlessly build a search interface in your front-end application. The goal behind behindInstantSearch is to help you implement great search experiences with no effort by providing you with a complete search ecosystem. In detail, InstantSearch comes with several front-end components that you can assemble into unique search interfaces.
Get Started with Algolia + Next.js
You can have a look at the full code of the Next.js demo app integrated with Algolia in the GitHub repository supporting the article. Clone it and launch the demo web application locally with the following commands:
git clone https://github.com/Tonel/next.js-blog-with-algolia-instantsearchcd next.js-blog-with-algolia-instantsearchnpm inpm run devNow, let’s learn how to achieve this result!
Before learning how to integrate Algolia InstantSearch into your app, let's set up a Next.js application.
For the sake of simplicity, you can use DatoCMS’s Next.js Blog starter project. But keep in mind that any other Next.js project will do.
Follow the instructions in the GitHub repository of the Next.js Blog starter project. Let’s call the project “Next.js Blog with Algolia InstantSearch” as below:
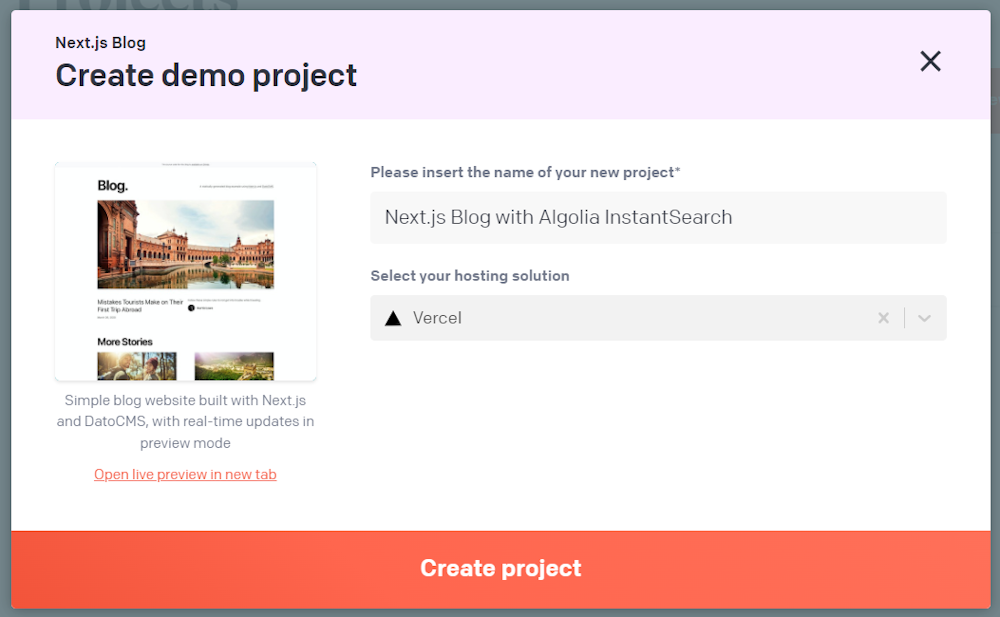
Choose Vercel as the hosting and deployment platform. Then, keep following the initialization process until you get the following window:
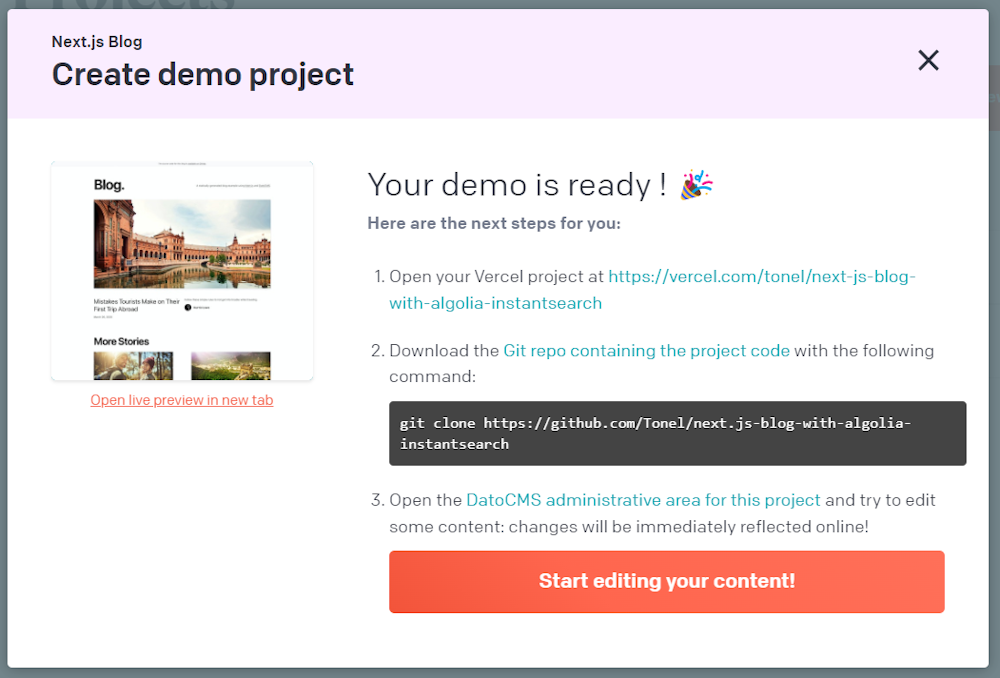
At this point, you should now be able to access your Vercel project. In this example, the demo application public URL provided by Vercel is:
https://next-js-blog-with-algolia-instantsearch-cyqm9r9er-tonel.vercel.app/Now, launch the git clone command you can see in the confirmation window. This will download the project that has just been created automatically by the process. In this example, the command is:
git clone https://github.com/Tonel/next.js-blog-with-algolia-instantsearchThen, configure your .env file as explained in the GitHub repository of the Next.js Blog starter project. You can now launch your project locally with the following commands:
npm installnpm run devVisit http://localhost:3000 in your browser, and you should now be seeing the web page below:

You are ready to integrate Algolia InstantSearch! Let’s learn how!
Prerequisites
To make Algolia InstantSearch work, you need the following two libraries.
algoliasearch: A fast, complete, fully-featured JavaScript API client to interact with Algolia API.
react-instantsearch-dom: A library that allows you to build fast search UIs based on Algolia in React.
You can add both to your project’s dependencies with the command below:
npm install algoliasearch react-instantsearch-domSet Up Algolia
Follow this step-by-step tutorial and learn how to configure Algolia.
Sign up for Algolia
First, you need to create an Algolia account.
If you already have an Algolia account, you can skip this step.
Otherwise, you can sign up for Algolia here.
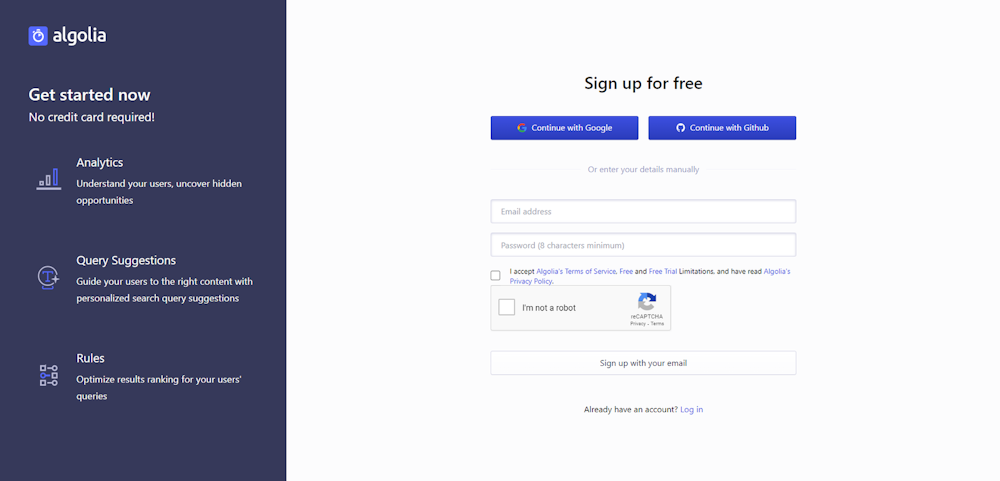
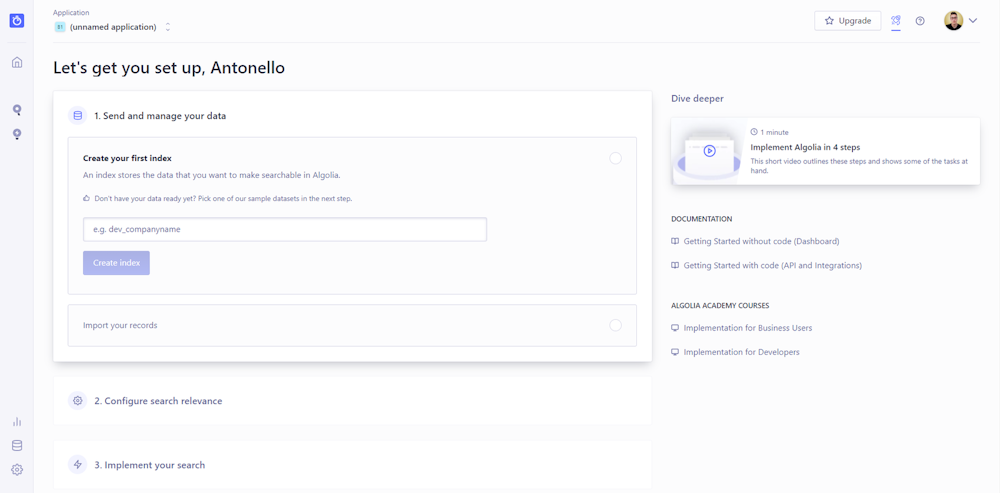
Follow the instructions until you land on the page below:
Define your Algolia index
Now, you need to create your first index. An Algolia index stores the data that you want to make searchable in Algolia. You can think of an Algolia index as a sort of NoSQL document that keeps JSON objects of your content. Learn more about indexing in Algolia.
Fill out the form you see on the page where you landed at the end of the sign-up process as below:
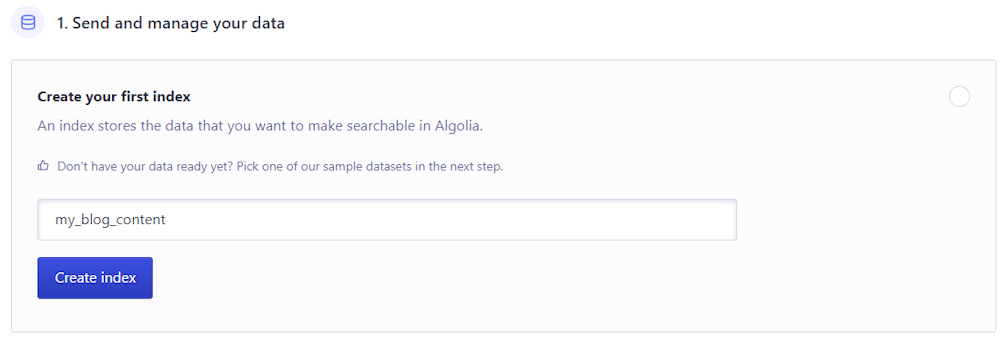
Algolia indexCall your index “my_blog_content,” and click “Create index.”
Retrieve your API Keys
You now have to retrieve your Algolia keys. You can find them in the Settings > API Keys page below:
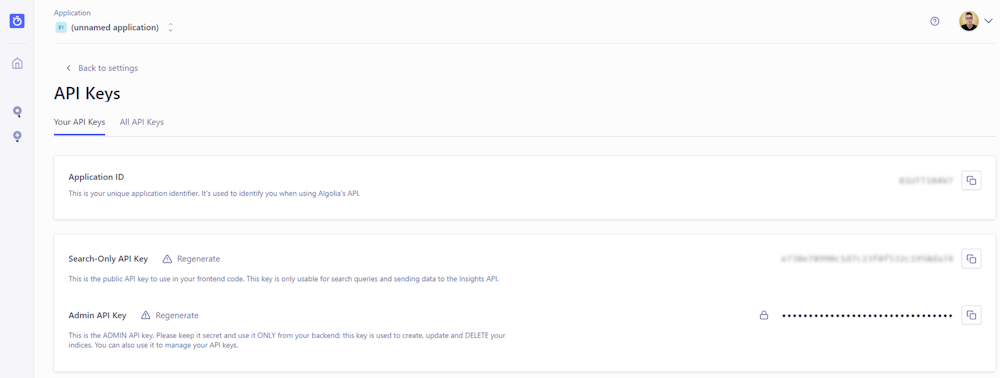
Here, you can see your Algolia Application ID, Search-Only API Key, and Admin API Key. Store them in the .env file of your Next.js application as follows:
NEXT_PUBLIC_ALGOLIA_APPLICATION_ID=<YOUR_ALGOLIA_APPLICATION_ID>NEXT_PUBLIC_ALGOLIA_SEARCH_ONLY_API_KEY=<YOUR_ALGOLIA_SEARCH_ONLY_APY_KEY>ALGOLIA_ADMIN_KEY=<YOUR_ALGOLIA_ADMIN_KEY>Application ID and the Search-Only API Key provide read-only access to your search results. In detail, you will use them when implementing InstantSearch in the frontend, and it is safe to expose them to the client. You can achieve this by prefacing these two environment variables with NEXT_PUBLIC_.
On the other hand, the Admin API Key must remain secret. This is because this key provides write access to your Algolia index. Therefore, it should be used exclusively on the server side.
Congrats! You just finished setting up Algolia! Let’s now start writing some code!
Programmatically Import Your Data to Algolia
Let’s learn how to create a Next.js API that fetches your data, converts it into a new format, and sends it to your Algolia index. This is necessary because you need to provide Algolia with some data if you want to take advantage of its search capabilities. To achieve this, you can use the Algolia API.
Build a Next.js API to upload your data to your Algolia index
First, let’s create a Next.js API to write your data to your Algolia target index. Keep in mind that any JavaScript file inside the pages/api folder will be treated by Next.js as an API endpoint.
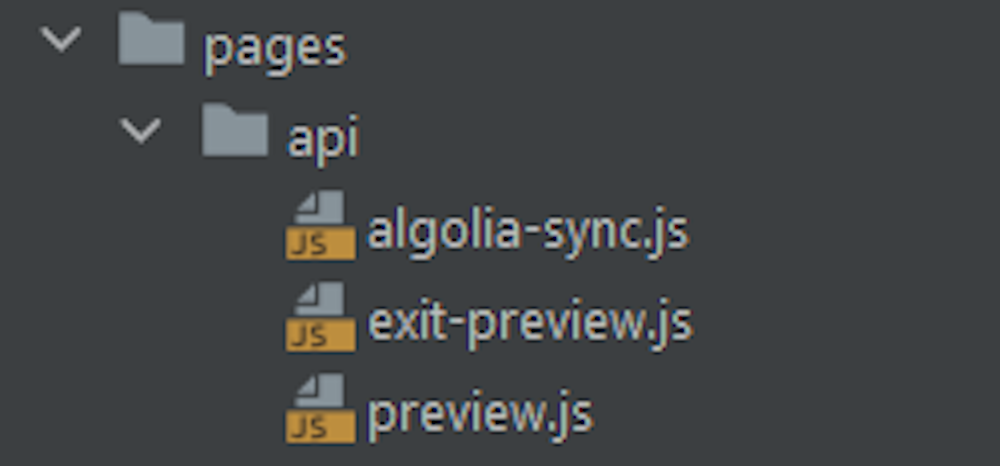
So, create algolia-sync.js file in the pages/api folder as follows:
import { request } from '@/lib/datocms';import algoliasearch from 'algoliasearch/lite';
export default async (req, res) => { // initializing the Algolia client with the secret keys if (req.method === 'POST') { // Process a POST request
const algoliaClient = algoliasearch( process.env.NEXT_PUBLIC_ALGOLIA_APPLICATION_ID, process.env.ALGOLIA_ADMIN_KEY, );
// setting the Algolia index related to your blog const index = algoliaClient.initIndex('my_blog_content');
const pageSize = 20;
// retrieving all posts from the headless CMS const allPostsGraphqlRequest = (first, skip) => { return { query: ` { allPosts(orderBy: date_DESC, first: ${first}, skip: ${skip}) { id title slug excerpt date } meta: _allPostsMeta { count } } `, }; };
const postResponse = await request(allPostsGraphqlRequest(pageSize, 0)); // the number of all posts available const postCount = postResponse.meta.count;
// iterating over the posts because the allPosts query is paginated // by default for (let page = 0; page < Math.ceil(postCount / pageSize); page++) { const posts = await request( allPostsGraphqlRequest(pageSize, page * pageSize), );
// converting tha data retrieved by the headless CMS // into the desired Algolia format const algoliaPosts = posts.allPosts.map((post) => { return { objectID: post.id, title: post.title, excerpt: post.excerpt, slug: post.slug, date: post.date, }; });
// saving the post info to Algolia await index.saveObjects(algoliaPosts); }
res.json(`Content successfully synchronized with Algolia search`); res.end(); }};As you can see, this API takes care of fetching all your blog post data from DatoCMS, one page at a time
Then, it converts the data into a format more convenient for Algolia, and uses the Algolia API to write it to your Algolia index. In detail, you have to convert your data because every Algolia object in an index requires a objectID field. If you do not send an objectID, you can ask Algolia to generate it for you.
Keep in mind that Algolia's saveObjects()function redefines the entire set of an object’s attributes, except for its objectID field. In other words, if an object is not present in the index based on its objectID field, Algolia adds it. Otherwise, it fully replaces all its attributes. This means that when calling this API multiple times, you should not worry about producing duplicates on the Algolia index. Also, saveObjects() automatically divides your records into batches of 1,000 elements behind the scene to provide good performance. So, you can pass as many objects as you want to the Algolia API.
You now need to deploy your application so that you can then publicly access the API you just defined. Keep in mind that in a real-world scenario, you should protect the API with an authorization system, such as Basic Access Authentication.
If you are following the current example and your GitHub repo is connected to Vercel, you first need to set up the environment variables on Vercel. To achieve this, visit the “Environment Variables” page of your “Project Settings” and define the same environment variables contained in the .env file.
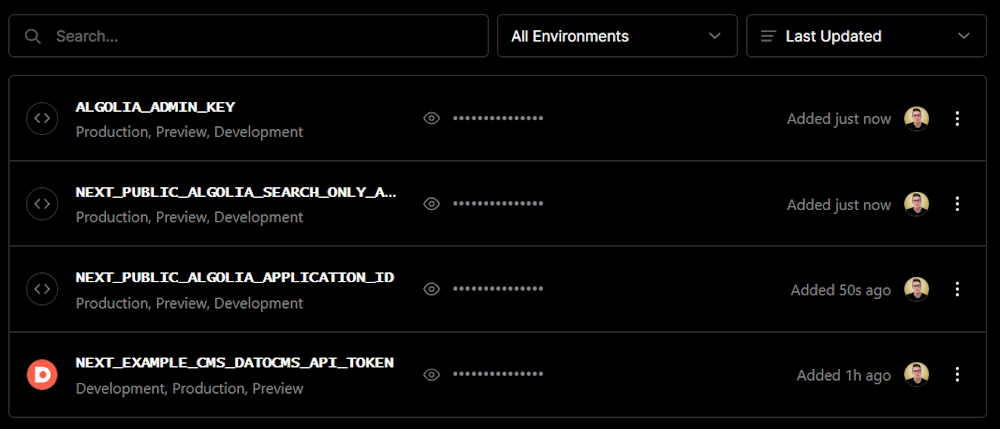
Then, you only have to perform a git push operation with the commands below:
git add .git commit -m "Algolia Sync API added"git push originAt the end of the process, Vercel will automatically redeploy your application. So, you will be able to launch the API by hitting the /api/algolia-sync path in your online app on Vercel. In this example, the complete path to call the API is:
https://next-js-blog-with-algolia-instantsearch-cyqm9r9er-tonel.vercel.app/api/algolia-sync
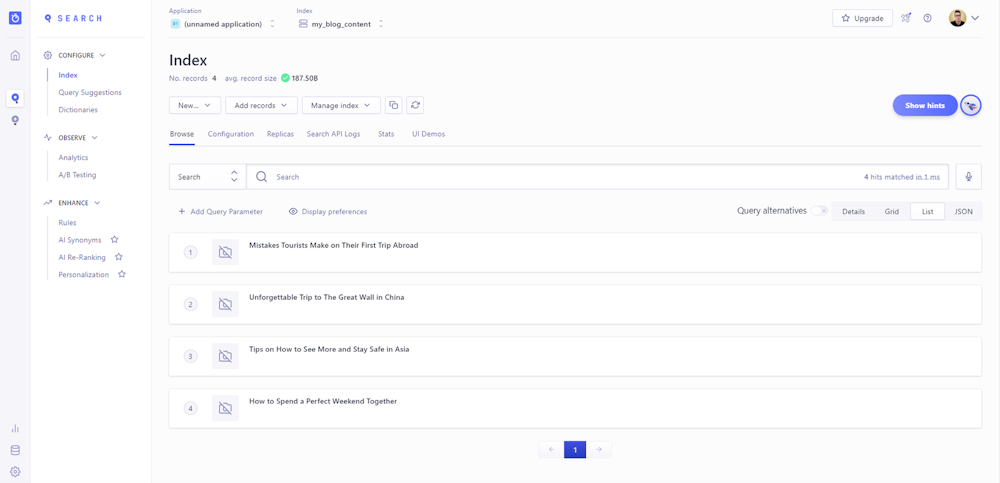
Call the API, wait for it to complete, and visit the Data Sources > Indices > my_log_content page in the Algolia platform. Here, you can verify if the blog data has been written correctly to the Algolia index. You should be seeing the following list:
Create a DatoCMS Webhook to call the API
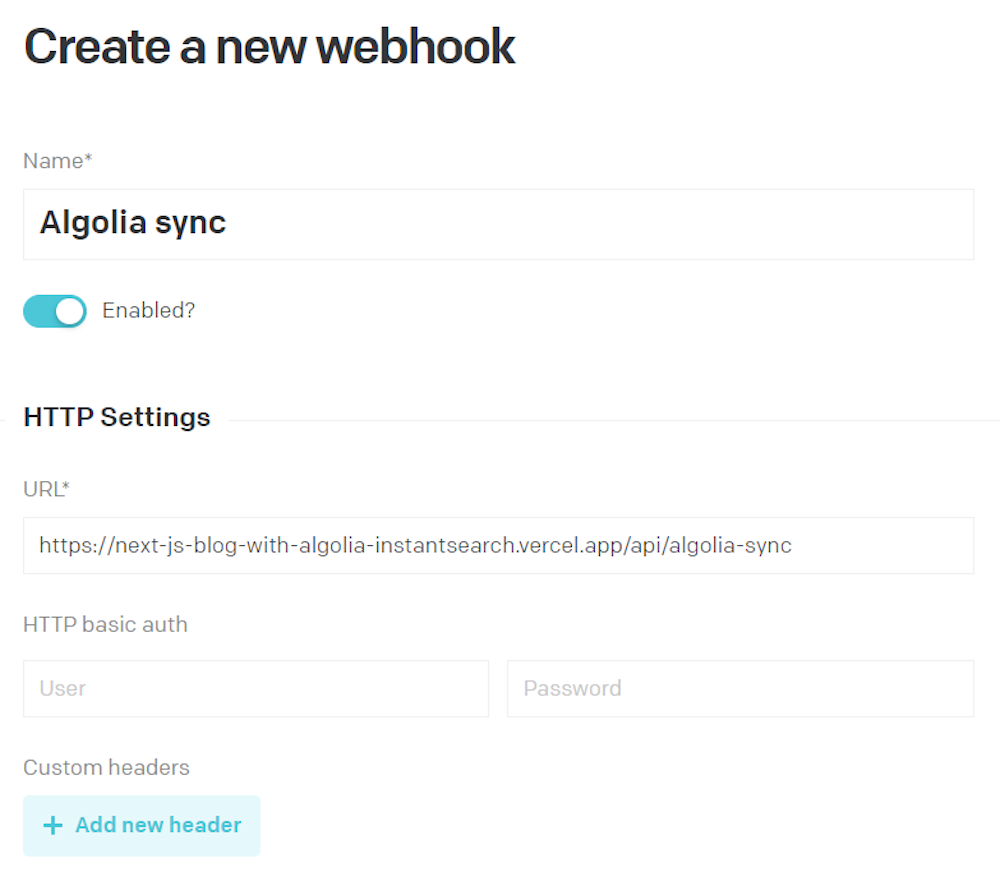
DatoCMS allows you to create webhooks. A DatoCMS webhook sends an HTTP notification when data changes in one of your projects, based on how you defined it. For example, you can use a webhook to synchronize DatoCMS data with third-party systems, such as Algolia.
In this case, you can set up a DatoCMS webhook that calls the API defined above every time a new post is published. Visit the Settings > Webhooks section of your DatoCMS admin area and create a webhook as follows:
Then, define the following trigger:
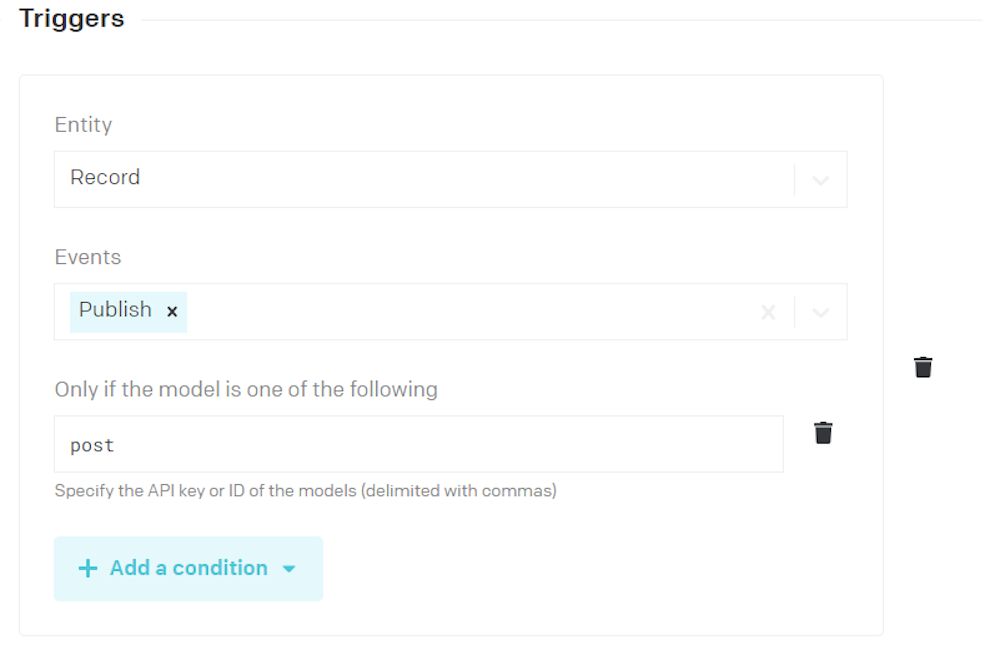
This way, the webhook will be triggered every time a blog post gets published. Click on “Submit” and your webhook should now be live!
Verify that the data synchronization process works
To verify that the webhook works, update the title of the “Mistakes Tourists Make on Their First Trip Abroad” post in the DatoCMS content management panel as below:

Click “Save,” then “Publish.” DatoCMS will perform an HTTP POST request towards the specified endpoint. The HTTP body will be in JSON format, and will contain all the information relevant to the event just happened.
Now, visit your Algolia index data page and you should see the new title, as follows:
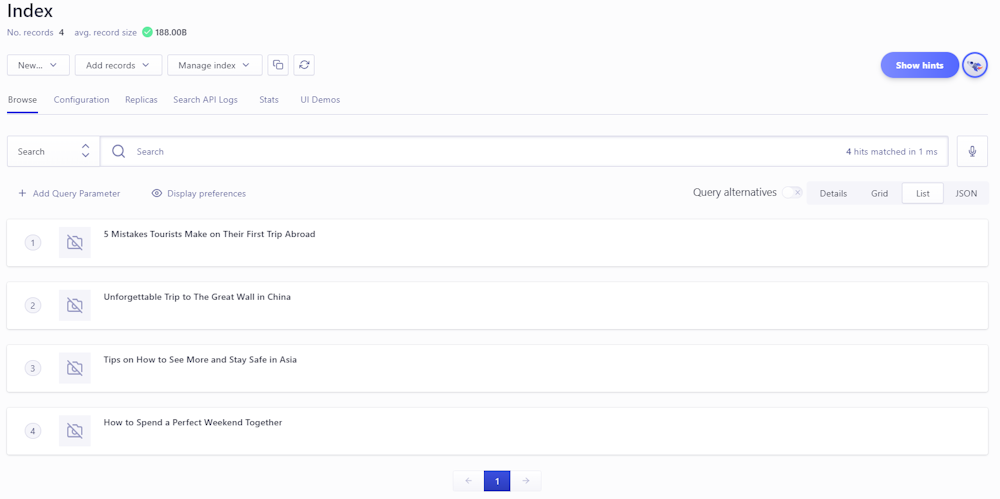
Great! You just integrated Algolia with DatoCMS. As you can see, it took only a few minutes.
Integrate Algolia InstantSearch in the Next.js Frontend
Algolia InstantSearch provides you with some basic components, but these have a style and interaction that may not fit your Next.js application. Fortunately, you can build Algolia Search frontend functionality with custom search components. Let's see how!
Build custom search components on Next.js
First, let’s define a SearchBox component as follows:
import { connectSearchBox } from "react-instantsearch-dom"
function SearchBox({ refine }) { return ( <input className="search-box" type="search" placeholder="Search..." onChange={(e) => refine(e.currentTarget.value)} /> )}
export default connectSearchBox(SearchBox)This is the input component where the users can type the search text to provide Algolia with. In detail, the connectSearchBox() function from react-instantsearch-dom automatically connects the custom search box to the InstantSearch client.
Then, you will need a SearchHits component:
import { connectStateResults } from 'react-instantsearch-dom';import Link from 'next/link';
function SearchHits({ searchState, searchResults }) { // checking if the query length is >= 3 // (since 3 is the minimum Algolia query length) const validQuery = searchState.query?.length >= 3;
return searchState.query && validQuery ? ( <div className={'search-hits'}> {searchResults?.hits.length === 0 && <div>No results found!</div>}
{searchResults?.hits.length > 0 && searchResults.hits.map((hit) => ( <div key={hit.objectID} className="text-2xl mb-3 leading-snug"> <Link href={`/posts/${hit.slug}`}> <a className="hover:underline">{hit.title}</a> </Link> </div> ))} </div> ) : null;}
export default connectStateResults(SearchHits);This component displays the search results returned by Algolia. Specifically, the connectStateResults() function provides the custom component with the Algolia state and search hits. The hits are nothing more than the results returned by the Algolia API based on the search text provided by the user in the SearchBox component.
Now, let’s build a Search component by using the two components above:
import algoliasearch from "algoliasearch/lite";import { InstantSearch } from "react-instantsearch-dom";import SearchBox from "./search-box";import SearchHits from "./search-hits";
const searchClient = algoliasearch( process.env.NEXT_PUBLIC_ALGOLIA_APPLICATION_ID, process.env.NEXT_PUBLIC_ALGOLIA_SEARCH_ONLY_API_KEY,);
export default function Search() { return ( <div className={"algolia-search"}> <InstantSearch searchClient={searchClient} indexName="my_blog_content"> <SearchBox /> <SearchHits /> </InstantSearch> </div> );}This is based on the Algolia InstantSearch component, which requires a searchClient and an indexName. The first is an instance of the Algolia API client you can create with the algoliasearch library, while the second is the name of your Algolia target index.
Add the Search component to your homepage
Now, update your index.js file to use the Search component defined earlier. All you have to do is import Seach and place it inside the Container component, as follows:
// omitted for brevity ...import Search from '@/components/search';
export default function Index({ subscription }) { // omitted for brevity ...
return ( <> <Layout preview={subscription.preview}> <Head>{renderMetaTags(metaTags)}</Head> <Container> <Search /> <Intro /> {heroPost && ( <HeroPost title={heroPost.title} coverImage={heroPost.coverImage} date={heroPost.date} author={heroPost.author} slug={heroPost.slug} excerpt={heroPost.excerpt} /> )} {morePosts.length > 0 && <MoreStories posts={morePosts} />} </Container> </Layout> </> );}
// omitted for brevity ...Similarly, add the Search component to the posts/[slug].js post page:
// omitted for brevity ...import Search from "@/components/search";
// omitted for brevity ...export default function Post({ subscription, preview }) { // omitted for brevity ...
return ( <Layout preview={preview}> <Head>{renderMetaTags(metaTags)}</Head> <Container> <Header /> <Search /> <article> <PostHeader title={post.title} coverImage={post.coverImage} date={post.date} author={post.author} /> <PostBody content={post.content} /> </article> <SectionSeparator /> {morePosts.length > 0 && <MoreStories posts={morePosts} />} </Container> </Layout> );}Now, all your blog web pages offer useful and effective search functionality!
Algolia Search in Action in Next.js
Visit http://localhost:3000 in your browser, and you should be seeing a search input on top of your blog’s homepage. Type at least three characters, and Algolia InstantSearch will provide you with the corresponding search results, as below:
Et voilà! You just learned how to integrate Algolia InstantSearch into a Next.js project!
Algolia Next.js - Conclusion
In this article, you learned what Algolia InstantSearch is, how to set up Algolia, and how to integrate it into a Next.js blog website based on a headless CMS. As seen, integrating Algolia with DatoCMS takes only a few minutes. This is just one of the many integrations you can achieve with a powerful composable tool like DatoCMS.
Thanks for reading! We hope that you found this article helpful. Feel free to reach out to us on Twitter with any questions, comments, or suggestions.
- What Is Algolia InstantSearch?
- Get Started with Algolia + Next.js
- Prerequisites
- Set Up Algolia
- Sign up for Algolia
- Define your Algolia index
- Retrieve your API Keys
- Programmatically Import Your Data to Algolia
- Build a Next.js API to upload your data to your Algolia index
- Create a DatoCMS Webhook to call the API
- Verify that the data synchronization process works
- Integrate Algolia InstantSearch in the Next.js Frontend
- Build custom search components on Next.js
- Algolia Search in Action in Next.js
- Algolia Next.js - Conclusion

