Nuxt blog
How To Build a Blog With Nuxt and a Headless CMS
Nuxt Content allows you to create a blog in Nuxt in a matter of minutes. However, it comes with several limitations you cannot overlook. On the contrary, a headless CMS is a great way to create a is fast, flexible, and easy-to-manage Nuxt blog. With a headless CMS, the content management functionality is decoupled from the presentation layer, enabling greater flexibility and scalability in content delivery. In this guide, you will find out how to create a blog with Nuxt and a headless CMS.
Follow this tutorial and learn how to build a blog using Nuxt and a headless CMS for content management!
Create a Blog With Nuxt Content
Nuxt Content is a module to make content management in a Nuxt.js app easier. In detail, Nuxt Content adds Git-based headless CMS capabilities to a Nuxt 3 project. This allows developers to read, manage, and display content from Markdown, JSON, YAML, and CSV files through an API-like interface.
Nuxt Content also offers features such as route generation, pagination, and metadata customization to help build dynamic and SEO-oriented content pages. In other words, Nuxt Content provides everything you need to build a file-based blog with Nuxt.
You can use Nuxi (the Nuxt.js CLI) to initialize a Nuxt Content project called nuxt-content-blog with:
npx nuxi init nuxt-content-blog -t contentThe nuxt-content-blog will now contain a blank Nuxt Content project.
Enter the project folder and install the project dependencies with:
cd nuxt-content-blognpm installRun the command below to start the development server and launch the Nuxt app locally:
npm run dev
Visit http://localhost:3000, and you should now be seeing the following web page:

As explained by the sample home page, the rendering logic of the web app is defined in the pages/[...slug].vue file initialized by Nuxi. This is what [...slug].vue looks like:
<template> <main> <ContentDoc /> </main></template>The <ContentDoc> Nuxt Content component renders the body of a Markdown document or similar files in a rich-text format. By default, <ContentDoc> fetches .md, .json, .yml, and .csv files from the content/ directory and renders them into web pages.
Explore the content/ folder, and you will find the index.md below:
# Nuxt Content
This page corresponds to the `/` route of your website. You can delete it or create another file in the `content/` directory.
Try to navigate to [/about](/about). These 2 pages are rendered by the `pages/[...slug].vue` component.
---
Look at the [Content documentation](https://content.nuxtjs.org/) to learn more.
This corresponds to the sample index page shown earlier. Keep in mind that this file was created by Nuxi at initialization time. Now, all you have to do is create a blog/ folder under content/ and put your Markdown blog posts there. Then, style your app as you desire and your Nuxt blog will be ready. Follow the official guide on how to create a blog with Nuxt Content to find out more.
As you just learned, Nuxt Content allows you to build a blog using Nuxt.js in just a few minutes and with a handful of lines of code. But is this really the best approach to building a blog with Nuxt?
Let's explore other approaches and find an answer!
Nuxt Content Limitations
Just like all file-based CMSs, Nuxt Content comes with several limitations. Here are the most important ones you should take into account:
Limited scalability: File-based CMSs are not designed to handle large amounts of content. As the number of files grows, it becomes increasingly difficult to distribute, manage, and organize them.
Limited shareability: Content created for a file-based CMS must follow the formats supported by the CMS itself. As a result, distributing and reusing that content for other services and projects may become difficult.
Limited usability: A file-based CMS such as Nuxt Content does not come with a complete, advanced, intuitive UI to create, edit, and delete content. On the contrary, it relies on the editing capabilities offered by other software.
These are just a few problems but there are many other problems with file-based CMSs, such as multimedia file management. For this reason, Nuxt Content might not the best solution to create a blog. So, what to do now?
The answer is simple, adopt a headless CMS! In detail, a headless CMS is a backend SaaS (Software as a Service) platform that acts as a single source of truth, allowing the same content to be distributed across different platforms and services. Thus, a headless CMS uses a centralized database to manage large amounts of content, provides APIs for content distribution, and comes with an intuitive user interface for creating and editing content. Simply put, a headless CMS enables you to avoid all the limitations mentioned above.
In addition, a powerful, cutting-edge, and fully-featured headless CMS such as DatoCMS comes with image management, SEO optimization, and internationalization features that a basic file-based CMS like Nuxt Content can only dream of.
Let’s now learn how to create a blog using Nuxt and a headless CMS like DatoCMS!
Build a Blog Based on a Headless CMS with Nuxt
Follow this step-by-step tutorial and find out how to create a blog in Nuxt that relies on a headless CMS for content management. If you are eager to take a look at the code of the end result, clone the GitHub repository that supports this article with:
git clone https://github.com/Tonel/nuxt-datocms-blogBuckle up! Time to find out how to integrate DatoCMS into a Nuxt app to build the blog of your dreams!
Initialize a Nuxt blog
First, you need a Nuxt.js project to start from. Instead of trying to extend the project created earlier, it is better to restart from scratch. Use Nuxi to initialize a Nuxt.js 3 project called my-nuxt blog with:
npx nuxi init my-nuxt-blognuxi init will create a blank Nuxt.js app. Enter the project folder, install the project’s dependencies, and launch your app to check if it works with:
cd my-nuxt-blognpm installnpm run devVisit http://localhost:3000 in your browser, and you should see the Nuxt welcome page below:
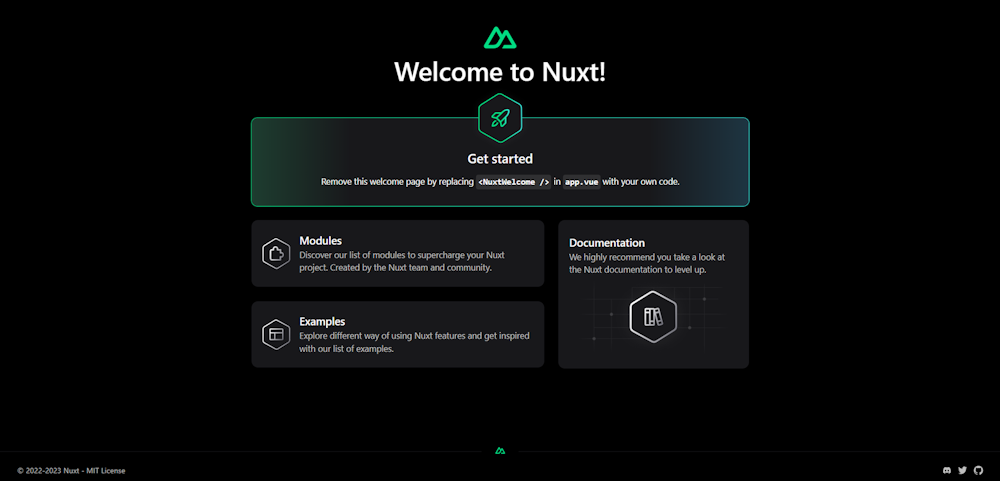
Great! Your Nuxt.js project works like a charm!
Set up a DatoCMS project
If you do not have a DatoCMS account yet, create an account for free. On the sign-up page, fill out the registration form below and follow the wizard to set up a DatoCMS account:

You can now get access to the DatoCMS dashboard and start taking advantage of its top-notch features. Visit the login page and enter your email and password to access the project dashboard below:
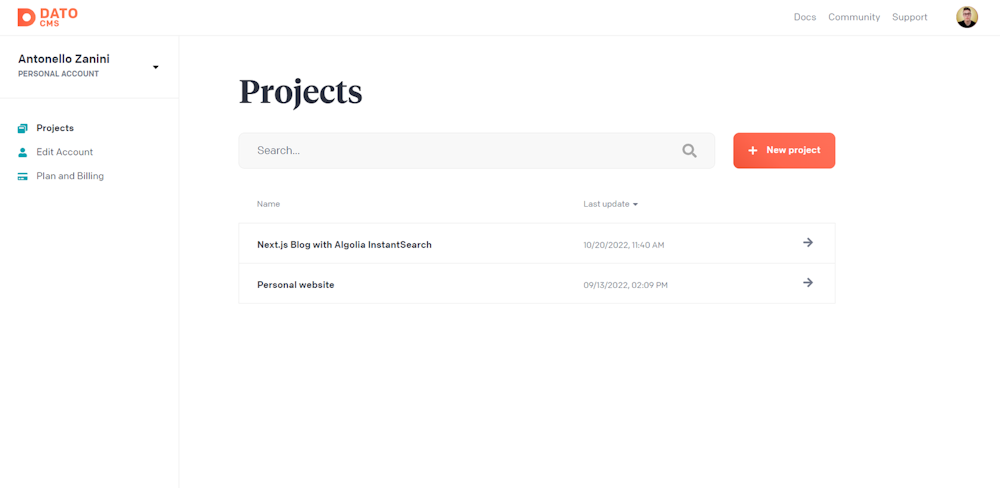
Click on the “New Project” button, and select the “Blank project” option:
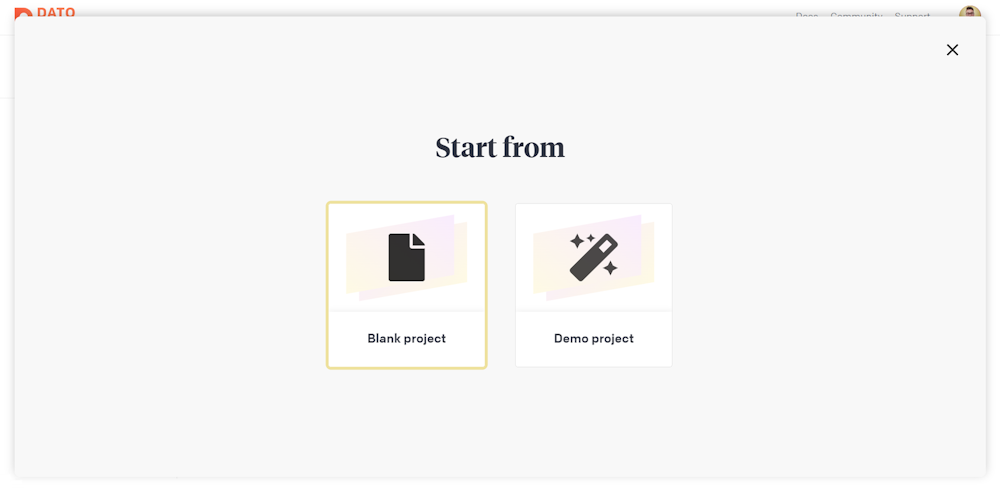
This will open a modal window. Give your project a name, such as “My Nuxt Blog,” and click “Create project.”
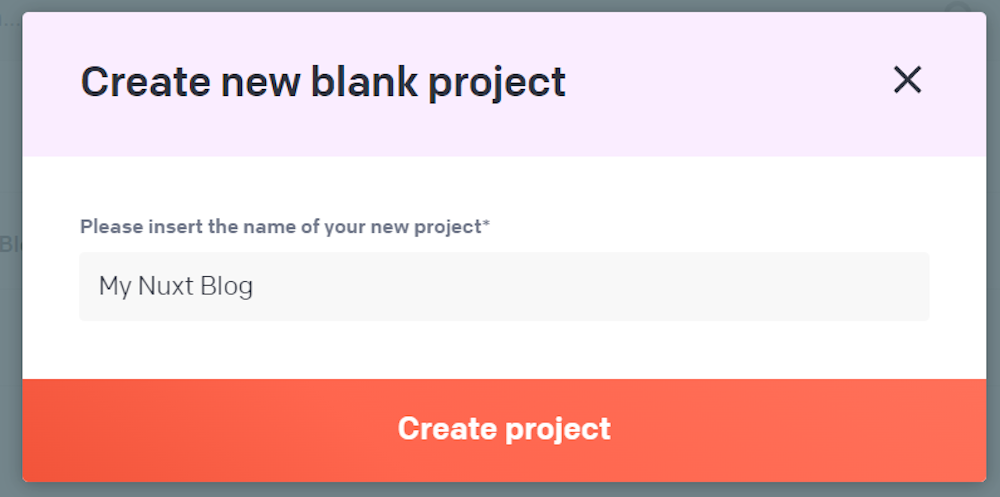
Wait for the initialization process to complete. The modal window will close, and you will be redirected to the project dashboard. In the project table, you will see the newly created DatoCMS project. Select it and then click the “Enter project” button to access it.
You are now inside your “My Nuxt Blog” DatoCMS project. As with any other CMS, the first thing to do is to define the structure of the content you want to manage. If you are not familiar with this process, take a look at our doc page on content modeling.
Click on the “Models” voice menu. On the “Models” page, click the “+” button, and set up a “Article” model as follows:
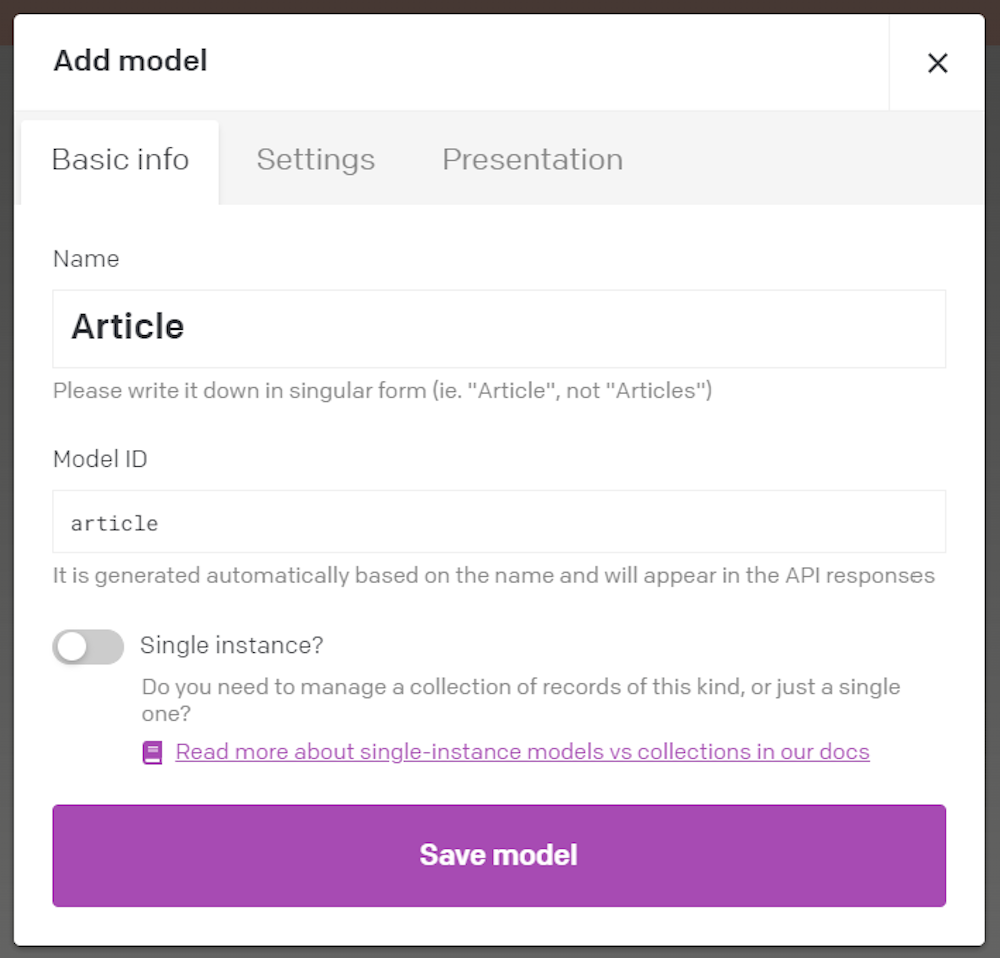
Click “Save model” to initialize the “Article” model. On the “Article” model page, click “Add new field” to add some fields to your models. Follow the docs for learning more about how fields work in DatoCMS.
A proper “Article” model needs at least a title, a slug, and a structured-text content field:

Do not forget that this is just a simple example. In a real scenario, you might need to define other models, such as authors, tags, and categories. Plus, you will need to add new fields for SEO, featured images, and relationships between models, such as between authors and articles. Showing how to do that is not the purpose of this article, but keep in in mind that you can achieve all that with no effort from the intuitive user interface offered by DatoCMS.
Now, it is time to populate your blog with some articles! Click on "Content" in the top menu to reach the content management dashboard. Then, click on the “Article” menu item on the left to access the page below:
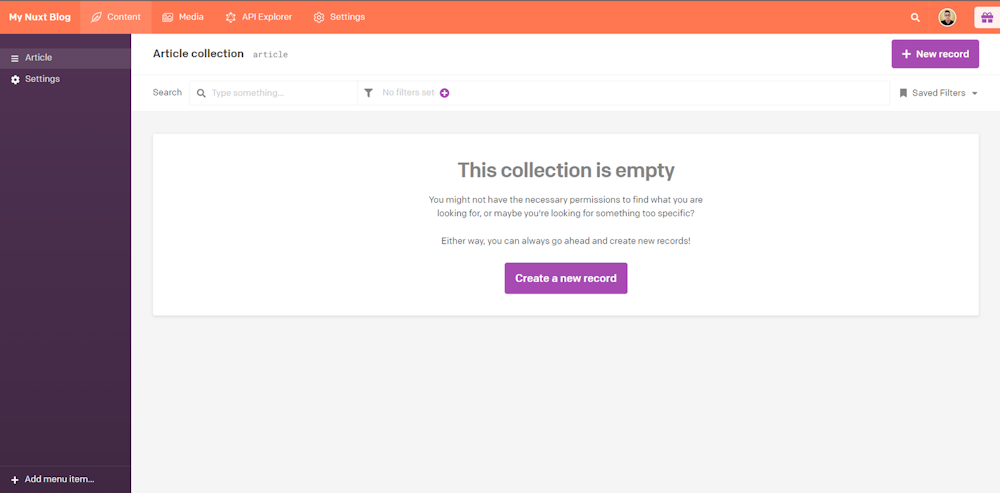
Click the “New record” button and create the first article of your blog in DatoCMS:
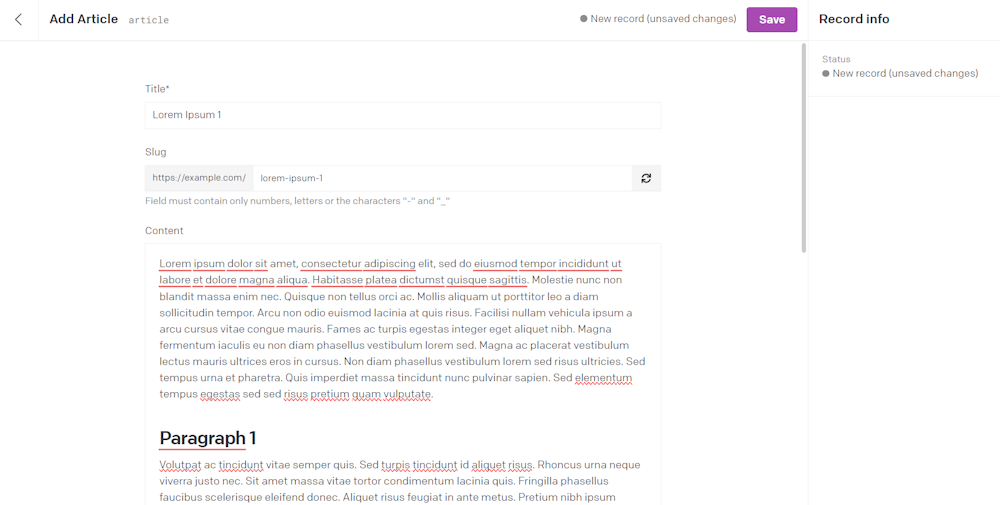
Note that the input elements you have access in that page correspond to the fields defined earlier in the “Article” model. Fill in these elements as you like and click "Save" to create your first blog post.
Take your time to create a few blog posts. If you do not know what to write in your posts, you can use Lorem Ipsum Generator to generate some sample articles.
Now, learn how to integrate DatoCMS into your Nuxt blog. Leverage the power of the headless CMS technology and retrieve content via API.
Integrate DatoCMS into your Nuxt.js blog
Before getting started, consider taking a look at the official guide on how to integrate DatoCMS with Nuxt.js. Anyway, by following this step-by-step section, you will see how to connect your Nuxt.js blog to DatoCMS.
Since Nuxt uses Vue.js as the frontend technology, you will need the DatoCMS Vue.js client. Add vue-datocms to your project’s dependencies with:
npm install vue-datocmsThis library comes with a set of components and utilities to connect a Vue.js app to DatoCMS. Specifically, it allows you to seamlessly use the DatoCMS Content Delivery API.
The majority of pages in your Nuxt blog will rely on content retrieved from DatoCMS. This means that they will need to make GraphQL requests to the DatoCMS Content Delivery API. To avoid code repetition, you should define a Vue composable containing the logic to call a DatoCMS API. A Vue composable is a function that contains reusable logic. In detail, Nuxt 3 automatically imports the Vue composables into your application if you place them in the composables/ directory.
So, create the composables/ folder and initialize a useGraphqlQuery.js file inside it as follows:
export default async function useGraphqlQuery({query, variables = {}}) { // a unique key to ensure that data fetching // can be properly de-duplicated across requests, const key = JSON.stringify({ query, variables });
// read runtime config to get access // to the DatoCMS API Token const runtimeConfig = useRuntimeConfig();
// perform the GraphQL request to the // DatoCMS Content Delivery API return useFetch('https://graphql.datocms.com', { key, method: 'POST', headers: { Authorization: `Bearer ${runtimeConfig.public.datocms.apiToken}`, }, body: { query, variables, }, transform: ({ data, errors }) => { if (errors) { throw new errors; }
return data; }, });};The function above relies on the useFetch() Nuxt composable to perform a GraphQL API request to DatoCMS. Note that the DatoCMS Content Delivery APIs are protected by authentication. To make authenticated requests to DatoCMS, you need to pass your read-only DatoCMS API token associated with your project into the HTTP Authorization header.
To retrieve that API token, open your project in DatoCMS. Reach the “Settings” section by clicking on the corresponding voice in the top menu. Then, click on the “API tokens” voice menu on the left. In the page below, select “Read-only API token,” and click the “Copy” button.
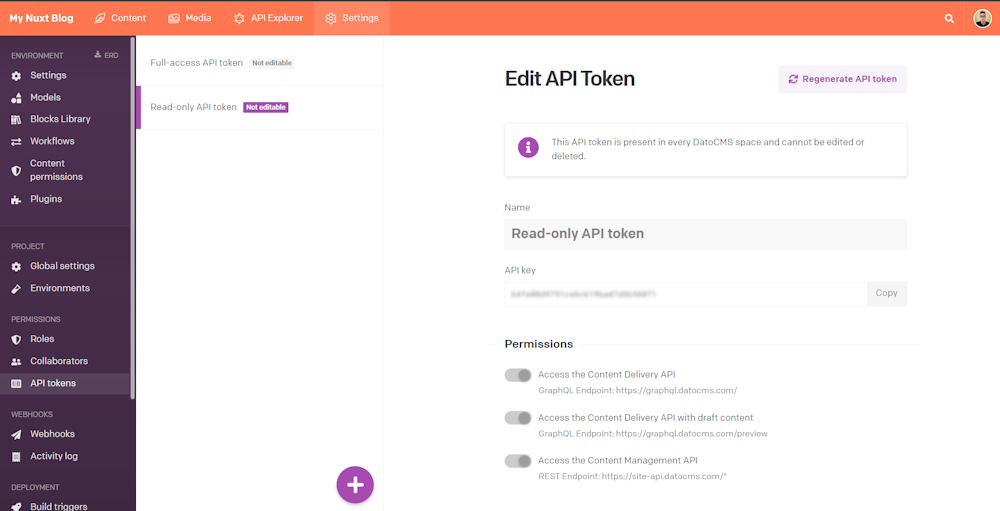
Store this value in a safe place. You will need it very soon.
As you can see in the useGraphqlQuery() function presented above, the DatoCMS API token is read from the Nuxt runtimeConfig variables. This Nuxt feature exposes values environment-variable-like values to the rest of your application. By default, these values are only available server-side, but become also available client-side when put under the public object field. Add a custom runtime config value in Nuxt by updating the nuxt.config.ts config file as follows:
export default defineNuxtConfig({ runtimeConfig: { public: { datocms: { apiToken: process.env.NUXT_ENV_DATOCMS_READ_ONLY_API_TOKEN }, }, },})The DatoCMS read-only API token allows you to retrieve the content that will be publicly displayed on the blog. For this reason, you can safely expose the token to the frontend by placing it under public. This also allows you to make requests to the DatoCMS Delivery Content API in the frontend.
During development, Nuxt supports .env files out of the box. So, consider creating a .env file and defining it as below:
NUXT_ENV_DATOCMS_READ_ONLY_API_TOKEN=<YOUR_DATOCMS_READ_ONLY_API_TOKEN>Replace <YOUR_DATOCMS_READ_ONLY_API_TOKEN> with the value of your project’s DatoCMS read-only API token retrieved before. Otherwise, set a specific environment variable in your system.
Now that you can retrieve content from DatoCMS, it is time to add the home and article page to your blog.
Add routing to the Nuxt blog
By default, Nuxi initializes a project containing an app.vue file. If present, that file represents the index page of your Nuxt site. However, when you create a pages/ folder, Nuxt will ignore that file and start applying a different logic for routing. In detail, Nuxt automatically provides a file-based routing based on Vue Router. Each file .vue file contained in the pages/ folder automatically becomes a web page in your Nuxt app.
So, delete the default app.vue file in your Nuxt project. Create a pages/ folder and initialize it with an index.vue file as below:
<template> <div class="page-title"> <h1> Blog Posts </h1> </div> <div class="blog-articles"> <div class="article-cards"> <div v-for="article in articles" v-bind:key="article.slug"> <nuxt-link :to="`/blog/${article.slug}`"> <div class="article-card"> <div class="article-title"> {{article.title}} </div> <div v-if="article.publicationDate" class="article-publication-date"> Article published on: {{ new Date(article.publicationDate).toLocaleString() }} </div> </div> </nuxt-link> </div> </div> </div></template>
<script setup>// retrieve the articles to show on the// home page of the blogconst { data, error } = await useGraphqlQuery({ query: ` { allArticles { id title slug publicationDate: _firstPublishedAt }}`});
// extract the articles from the data returned by DatoCMSconst articles = data.value?.allArticles || [];</script>This file represents the home page of your Nuxt blog. It uses the useGraphqlQuery() composable function defined earlier to perform a GraphQL query to DatoCMS and get all articles. Note that DatoCMS will return only the first 20 records by default. If you are not familiar with GraphQL, visit the “API Explorer” section in the DatoCMS dashboard to test and build GraphQL queries.
After retrieving the desired data via an API call, the index.vue file presents it in clickable cards that bring the user to the respective blog/<article_slug> blog post web page. Time to create that page!
In the pages/ folder, create blog/ directory and initializes with the following [slug].vue file:
<template> <div class="article"> <h1 class="article-title"> {{article.title}} </h1> <div v-if="article.publicationDate" class="article-publication-date"> Article published on: {{ new Date(article.publicationDate).toLocaleString() }} </div> <datocms-structured-text :data="article.content" class="article-content"/> </div></template>
<script setup>// to give the frontend page the ability to// render rich-text content fields via the// "<structured-text>" elementimport { StructuredText as DatocmsStructuredText } from 'vue-datocms';
// to get access to the "slug" dynamic paramconst route = useRoute()
// retrieve the data associated with an article// based on its slugconst { data, error } = await useGraphqlQuery({ query: ` query BlogPostQuery($slug: String!) { article(filter: { slug: { eq: $slug } }) { title slug publicationDate: _firstPublishedAt content { value blocks } } } `, variables: { // the dynamic "slug" parameter read // from the URL slug: route.params.slug, },});
// if the slug does not correspond to any articles,// return a 404 page with the "Page Not Found" messageif (!data.value?.article) { throw createError({ statusCode: 404, statusMessage: 'Page Not Found' })}
const article = data.value?.article;</script>This file represents the blog post page of your Nuxt site. In detail, [slug].vue is a dynamic route. In Nuxt, a dynamic route involves a parameter and can match multiple URLs. You can access the dynamic parameter through the useRoute() composable. In this case, the dynamic parameter is the slug string associated with the blog post to retrieve.
For example, suppose you visit the /blog/lorem-ipsum-1 page of your blog. The route.params.slug variable will contain the ”lorem-ipsum-1” string. You can then use this string to perform a query to the DatoCMS Content Delivery API and get the content of a specific article. Next, display the rich-text content of the selected article in the Vue.js template. To do so, you can use the <datocms-structured-text> Vue component coming with the vue-datocms library.
So, a Nuxt dynamic route allows you to display multiple blog posts consistently with just one page component.
Your Nuxt blog now has a home page that shows the last articles published and an individual page for each article. If you run the project and test your Nuxt site, you will notice that the UI of your blog is pretty basic. Let’s learn how to improve it.
Style your blog
All pages across your Nuxt project share a default Vue layout. If you want to change it, define a default.vue file inside the layouts/ folder. For example, this is what your new layout file may look like:
<template> <div class="header"> <nuxt-link :to="`/`">My Fantastic Blog</nuxt-link> </div> <div class="container"> <slot /> </div></template>
<style>@import url('https://fonts.googleapis.com/css2?family=Poppins&display=swap');
body { font-family: "Poppins", Helvetica, Arial,serif; margin: 0;}
.header { color: white; background-color: #696969; padding: 15px; margin-bottom: 30px;}
.header a { all: unset; font-size: 1.3em;}
.header a:hover { text-decoration: underline; cursor: pointer;}
.container { width: 100%; max-width: 1140px; margin-right: auto; margin-left: auto; padding-right: 15px; padding-left: 15px;}
@media (min-width: 768px) { .container { max-width: 720px; }}
@media (min-width: 992px) { .container { max-width: 960px; }}
@media (min-width: 1200px) { .container { max-width: 1140px; }}</style>The Vue general template file must always involve a <slot>. This is a placeholder component that will be replaced by the <template> component defined in the specific .vue files inside pages/. As you can see, to style a Vue component locally, you can simply add some CSS code in the <style> element.
You can style the home page of the Nuxt blog by adding the following lines to the pages/index.vue file:
<!-- ... -->
<style>.page-title h1 { font-size: 2em; text-align: center; margin-bottom: 20px;}
.blog-articles a { all: unset;}
.blog-articles a:hover { cursor: pointer;}
.blog-articles .article-card { border-radius: 10px; border: solid 1px #696969; padding: 25px 15px; margin-bottom: 10px;}
.blog-articles a:hover .article-card { border: solid 2px #FF7751;}
.blog-articles a:hover .article-title { color: #FF7751;}
.blog-articles .article-card .article-title { font-size: 1.4em; margin-bottom: 10px;}
.blog-articles .article-card .article-publication-date { color: #696969; font-size: 0.9em;}</style>
<!-- ... -->
Similarly, style the blog post dynamic page by adding the lines below to pages/blog/[slug].js:
<!-- ... -->
<style>.article h1 { font-size: 4.5em; margin-bottom: 10px;}
.article .article-publication-date { color: #696969; font-size: 0.9em; margin-bottom: 50px;}
.article .article-content h2 { margin-top: 40px; font-size: 1.5em;}
.article .article-content { font-size: 1.1em;}</style>
<!-- ... -->
Et voilà! Your blog in Nuxt.js will now look much better! Time to verify it!
Nuxt.js Blog in action
Open the terminal in the root folder of your project and launch the command below to start your Nuxt blog:
npm run devThis is what the home page of the blog will look like:
Then, if you click on an article card, you will be redirected to the blog post page below:
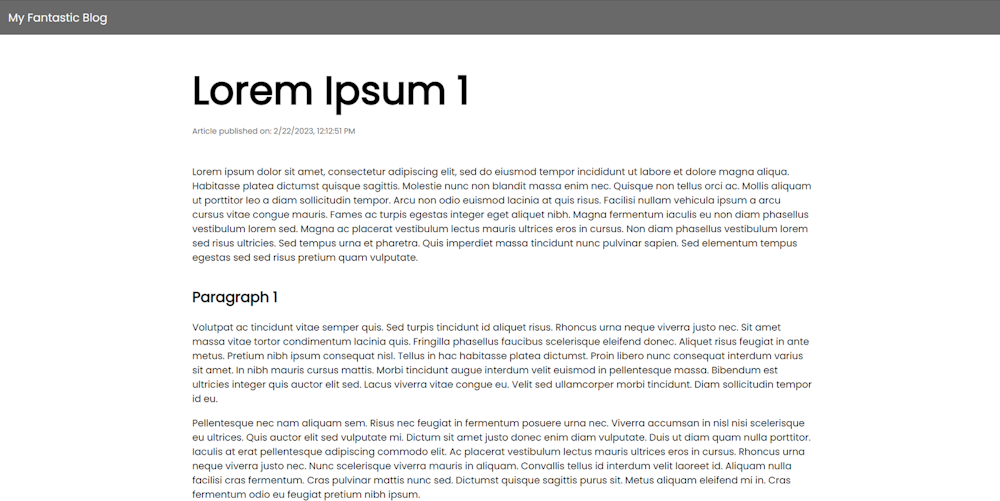
Et voilà! You just learned how to build a blog with Nuxt and DatoCMS as a headless CMS! The tutorial ends here, but it does not mean that there is nothing left to do. You could introduce Vue components, add pagination logic to the home, and use the DatoCMS component for displaying images. Keep improving your Nuxt blog!
Conclusion
In this article, you looked at different approaches to creating a blog with Nuxt.js. First, you learned how to build a blog with Nuxt Content and why this method has serious limitations that only an advanced headless CMS like DatoCMS can address. Then, you saw how to create a blog with Nuxt and DatoCMS in a step-by-step tutorial. As shown here, DatoCMS is a powerful Nuxt CMS that can be seamlessly integrated with Nuxt.js.
Thanks for reading! We hope that you found this article helpful. Feel free to reach out to us on Twitter with any questions, comments, or suggestions.


